Visual Effects: Lesson 06: Techniques for use in Particle Effects
Techniques for using Particle Effects in Unreal Engine 4.0
Beginner Level
Prerequisite – Lesson 05: This lesson builds directly on 05, I advise at least reading it quickly.
-Advanced Curve editing techniques in Cascade, for faster modification, iteration times.
This lesson will cover some of the less ‘Sexy’ aspects of FX creation. Quickly editing Color, Size, ScaleColor, and just about any other value over the lifetime of a sprite, mesh, light, etc. in Cascade is a fundamental part of making FX.
I am going to take some time and cover some of the basics of curve editing, and then get into more advanced features to help you quickly modify attributes of an effect with a high level of precision.
I will make my best effort to be as detailed as possible and include plenty of images, but if you are not 100% familiar with the curve editor now might be a good time to quickly read this page.
Let’s get started by duplicating the effect we created for Lesson 05, and name it something like P_CurveEdit. Double-click your effect to open Cascade. If you don’t have the effect from the previous lesson, take a minute and review Lesson 05 and create that effect really quickly.
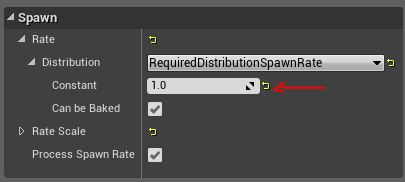
Set your Spawn rate to a value of 1.
Make sure your Lifetime is set to 1.
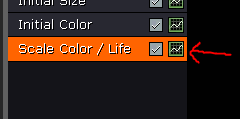
Next, map your Scale Color/Life module to the Curve Editor timeline by clicking on the small graph icon.
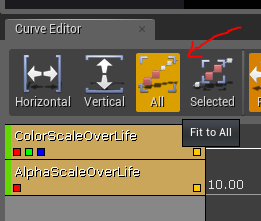
Press the All button in the Curve Editor to frame up your curves.
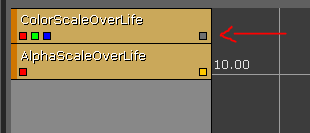
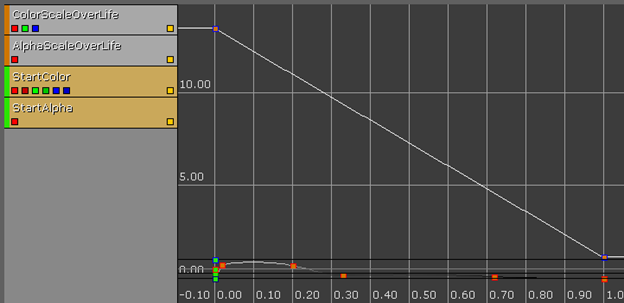
If you are using the duplicate effect from the previous lesson, you might have something like this on your timeline.
If not, set up your color/alpha curves to be similar and then disable the view of the ColorScaleOverLife curve with the radial button in the curve editor.
This time, instead of pressing the ‘All’ button to frame up your alpha curve, try holding Shift+Z key and move your mouse while holding the left mouse button. This will scale the curve view vertically, shrinking your curve in the view.
Now press the All button to frame up your curve on the timeline.
Try holding Shft+Z and moving your mouse from side to side while holding the right mouse button, this will scale your curve horizontally in the view.
You can tell when you have effectively entered the Zoom/Scale mode by watching the Pan/Zoom icons change above the graph.
Zooming in and out like this can be very helpful when you are trying to time up the alpha fade in/out of your alpha curve against the playback speed of a SubUV image sequence. Sometimes, I ease my SubUV playback in and out, depending on my alpha settings, so I get the most out of the frames in my image sequence. Or, perhaps there is a particular frame that has an element in it I want highly visible for a moment in time. Being able to scale a 0,1 curve in the view against a 0,63 curve can be very helpful.
Don’t worry about adding a SubUV index to your effect, I just wanted to better illustrate the point I was trying to make
Next, let’s hit the ‘All’ button again to frame the entire alpha curve in range.
Since this tutorial is about more advanced curve editing techniques, I am going to assume you already know how to move points along the curve, but let’s say you want to scale one of the values on your curve, and you need to do it precisely.
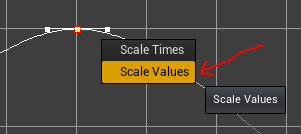
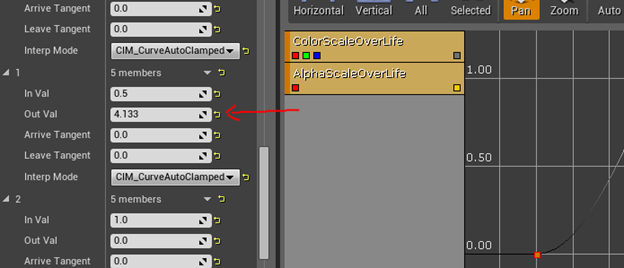
This is very easy in the curve editor. Marquee select your curve tangent, right-click, choose scale Values, and enter a value in the field of 4.133.
Note that if your initial value was 1, your new value for point 1 on your curve is now precisely 4.133.
Set the value back to 1 on the curve using the field shown above.
Now, let’s say you want to offset the entire curve, not just one point on the curve.
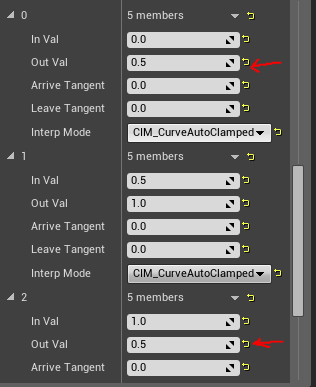
Using the same curve editing interface on the left of the curve editor, enter a value of .5 in the 0, and 2 positions.
Your curve should now map from .5 to 1 to .5 over the lifetime of the particle.
Marquee select the entire curve, right-click, and Scale your values by 1.5.
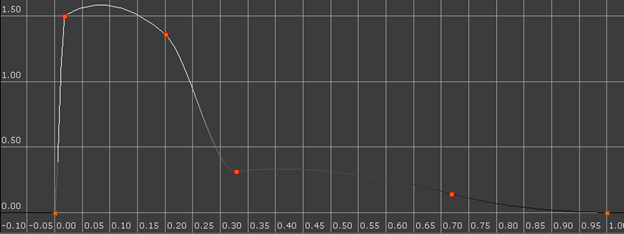
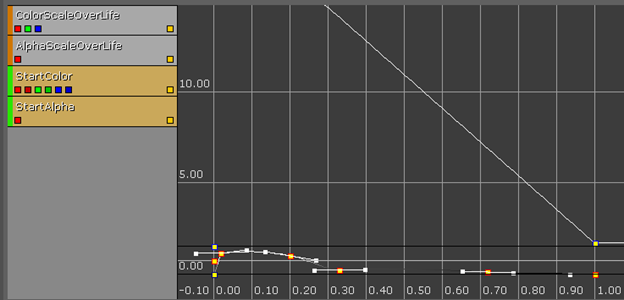
In the previous example, scaling by hand would be pretty straight forward, but with a curve like the one below, things might get a bit more hectic if you just wanted to punch your alpha up a bit…
Precisely scaling a curve like this up, or down while retaining timing is a cinch with the marquee select feature.
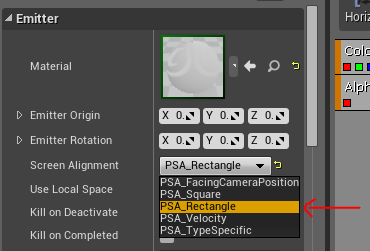
Let’s say we want to scale our size settings, which is often the case. Let’s go ahead and change the screen alignment mode of our sprite to be rectangle.
Click the Required Module and find the Screen Alignment drop down, click it and choose PSA_Rectangle.
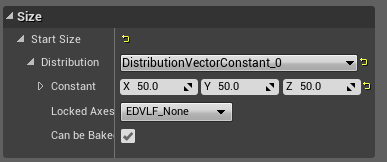
Select the Initial Size module and make sure your distribution is set to Constant.
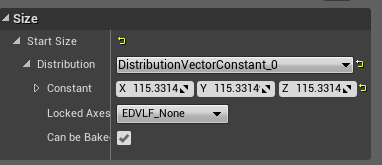
With Screen alignment set to Rectangle, if either of your X,Y vectors are set to 0 the particle will disappear. Set all of the values to 115.3315
Now, let’s say hypothetically that 115.3314 is the perfect size for your particle along the X axis. For any random reason you can come up with, it just HAS to be that width, but you need it to be twice as tall as it is wide - precisely twice as tall and not a guess. Sure, you could do this math in your head with a bit of concentration…maybe if you block out the music on your headphones …
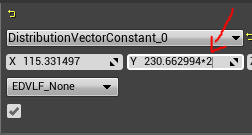
Or, you could just do the math right there in the field, in Cascade.
One of the best kept secrets about Cascade, the Material Editor and many other systems in UE4 is that you can do math, right in the input fields. So add *2 to the end of your Y value and hit enter.
Now your sprite size = 2* the width with some basic math. This can be incredibly handy when trying to tweak mesh emitter sizes based on values to which you construct your mesh in an external package, especially if you are using a mesh to convey gameplay specific areas such as a Heal Aura, or an area of Denial.
It is also helpful to keep in mind, anything you can marquee select in the Curve editor can have the same scale values applied to them in one go. If you need to scale Color and Alpha across multiple modules, do it in the Curve Editor to get it done quickly and precisely.
Here, I selected the curve points for multiple modules, even an InitialColor module with no time mapping, and scaled their values by 1.5.
Being able to scale your color values can be incredibly helpful if you have the perfect shade of Blue, for example, but you want to punch up the intensity a bit without fighting to keep the same hue.
Hopefully this workflow saves you some time when making tweaks to large complex FX.
