Visual Effects: Lesson 05: Techniques for using Particle Effects
Techniques for using Particle Effects in Unreal Engine 4.0
Beginner Level
-Setting up your FX with Initial Color and Scale Color modules, for quicker edits.
In addition to the particle color module we used in the first lesson, there are many ways to go about setting the color of your effects, depending on the usage case. For instance, you can set material parameters and drive the color through a Material Instance Constant. Or you can set material parameters and drive a color scalar through the use of a dynamic parameter.
Regardless of how you drive your color, it is always helpful to retain a high level of flexibility for making edits. This lesson might be one of the most basic of techniques, but I have found it to be a massive time saver over the years, and it is not one which is immediately obvious in Cascade.
Let’s get started.
For this lesson you will want to use an image with some grayscale values so it is easier to see your color changes.
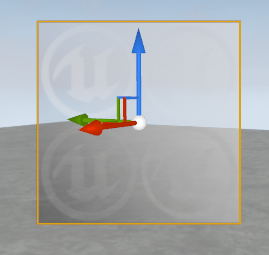
I am using a texture like this with some contrasting areas and a gradient pattern.
You can feel free to create any texture you need, or use something from the free sample content in the Marketplace.
Let’s go ahead and find your texture in the content browser, and then open up your M_Trans_Unlit_DepthFadeDynamic Material from the previous tutorial. If you don’t have that material, go ahead and create a material which makes use of the particle color expression discussed in the first lesson of this series.
The first thing we do is set up our Material so that we can make use of the Material Instance Constant (MIC) system within UE4. A MIC allows us to make changes to the parent material, in this case our DepthFade material, and have those changes trickle down the hierarchy to our MICs. So, if you add new functionality to your parent material, the MICs will automatically receive that functionality as well.
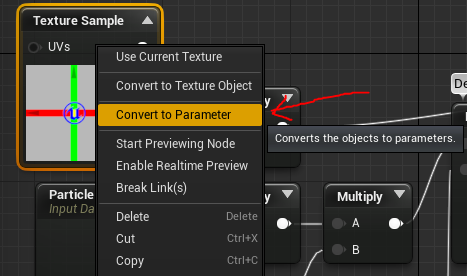
Click on your TextureSample expression, right-click it and choose Convert to Parameter.
By making this Texture Sample a parameter, we are exposing this texture to the Material system, and making it available for edit in a MIC.
Name the parameter "Emissive Texture." Compile and save your material, then return to the Content Browser.
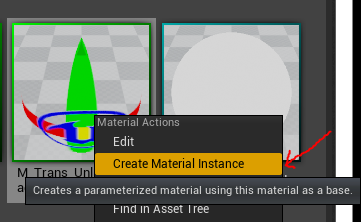
Right-click on your Parent Material and choose Create Material Instance.
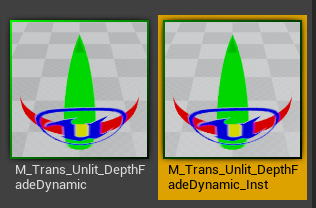
I prefer to allow the editor to name my new MIC with the suffix " _Inst" and retain the original name from the parent material.
This makes it easy to quickly identify the parent from the Content Browser. Next open the MIC by double clicking on it.
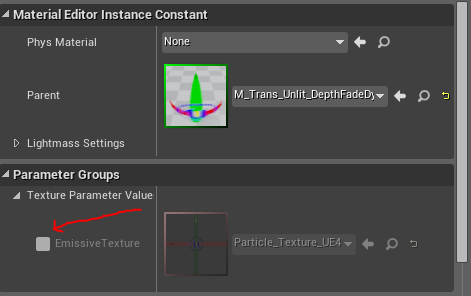
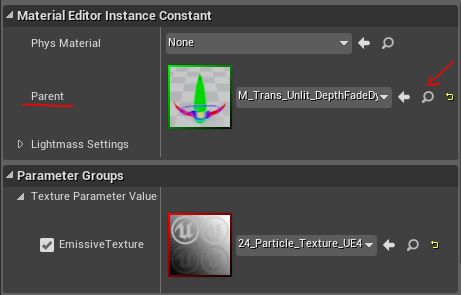
You will notice the MIC editor looks a bit different from the Material Editor. The material network is absent, and instead we are limited to the set of parameters which are editable. In this case, we only have our Emissive Texture available. Go ahead and check the box for Emissive Texture.
This enables you to edit the reference to the emissive texture in your project. Next, click the magnifying glass to find your texture in the Content Browser.
Select your texture in the content browser and press the Arrow in the MIC editor to assign the new texture.
TIP: If you are in the MIC editor and you aren’t sure which material is your parent material, just look above your parameter list. You can always browse to the parent from here.
Next, return to the content Browser and create a new particle system and name it "P_InitColor." Please create a new system from scratch so that I can illustrate something for you.
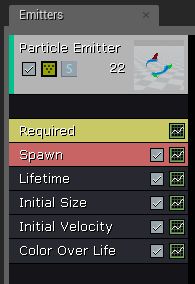
Take note that every time you create a new emitter in Cascade, these are the default modules present. There is nothing necessarily WRONG with this setup, but we are going to modify it and create a color control setup which gives us more direct control.
By default, the Color Over Life module is used. Several FX guys here at Epic use it on a daily basis, but my personal preference is to use a combination of modules.
Go ahead and assign your new MIC as the particle material in the Required module.
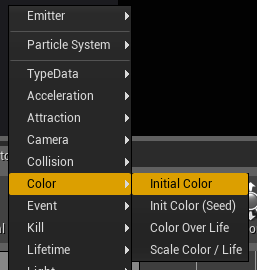
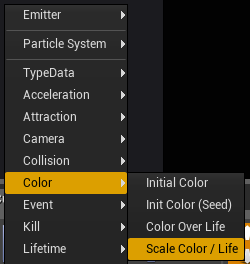
For now, let’s delete the Color/Life module, and add an Initial Color and Scale Color/Life module by right-clicking in the area beneath the emitter stack and choosing them from the color section of the drop down.
At first sight this may seem like I am telling to you create a setup which requires more maintenance. “Two modules vs. one?” you may ask, but I will show you that this setup will actually offer you a higher degree of control, which will require less tweaking in the long run.
What’s happening is that we will be using the Initial Color module to define our particle color when the particle is spawned. This is critical to understand, because the Initial Color module will only execute at particle creation time. This difference is important when it comes to modifying particle attributes at run-time, which I will cover later on.
The ScaleColor/Life module does exactly what the name implies, it scales color and alpha, over the lifetime of the particle. This is very freeing, because it means we can de-couple our color and alpha lifetime curves, from our initial particle color settings. To illustrate this, let’s go into the Scale Color/Life module and setup an ease-in, ease-out alpha curve as we did in the first lesson.
Next lower your spawn rate to a Constant, 1.
Increase the particle size to a Constant Vector, X 50.
Remember, because my screen alignment is set to square, the Y, Z, vectors are ignored. If I were to change my alignment to Rectangle, with these settings all of my particles would disappear. Because of this, I am in the habit of setting all my vectors to 50 for convenience.
This is not necessary, it’s just a workflow I have adapted so my particles do not disappear on me when I change screen alignments. This tricked me up on many occasions when I first started using Unreal Engine.
Place your effect in your level, and your particle should be greyscale and fading in and out over 1 second.
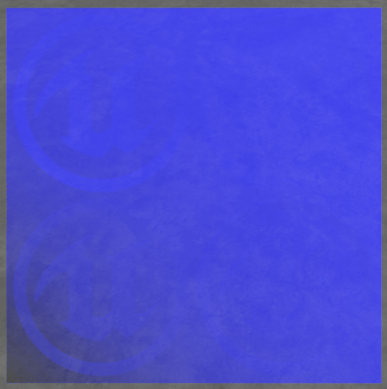
Let’s go ahead and edit our initial color now. I like blue, so let’s set the value to 0,0,1.
Now your particle should be blue, and fading in and out, but I don’t want my particle to become 100% opaque, ever.
With the Color Over Life module, I would be forced to go in and edit my alpha curve, but with the Initial Color module, I never have to touch my alpha curve again. I can just edit the alpha values in my initial color, and leave my curve that I painstakingly constructed alone. Go into the Initial Color module and set the alpha value to .5
If it hasn’t already become apparent to you, the flexibility in this setup lies in the fact that I can modify my base color/alpha settings separately from my scaleAlpha and scaleColor curves. I spend considerable time (possibly more than I would like to admit) tweaking colorScale values and getting my curves just right to make my particles !POP! and fade softly, or to get my fire to lick out with the right intensity.
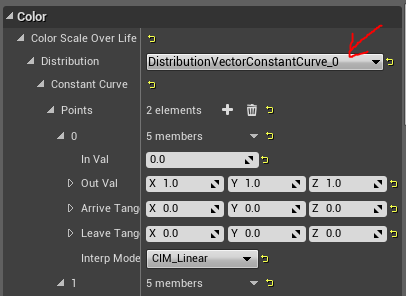
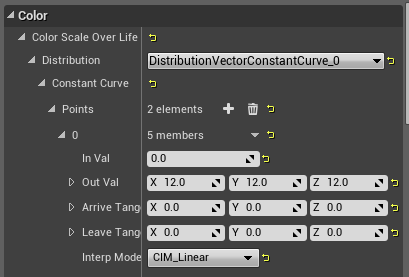
Let’s go in and change our Color Scale settings. Click the Scale Color/Life module and open up the color section, and make certain you have a constant curve distribution.
At the start of your curve, scale the values by 12 in the 0 position.
Now your sprite will start off very bright, and dim over its lifespan. Because we are easing in our alpha, we are missing the brightest section of our color curve, so you may want to play with your values to get something interesting. It’s always important to be mindful of the relationship between your curves.
Because UE4 uses floating point math, we can scale our values above 1, to over-brighten FX. This is a great way to BLAST out color. You might, for instance, use this for an explosion followed by a sharp decline to lower values.
At this point, I hope you see the value in this setup from a content management setup. Perhaps, six months from now your production manager will stop by and say, “Hey, we met with the publisher and they are really not big fans of the color red for our health bar and VFX. Can you change all of your VFX to green please?” You think to yourself, there are 22 separate heal FX…this could take all day.
With the system outlined above, you just go in, change your Initial Color to Green, and you are done.
With the Color Over Life module, not only would you need to change the color of every FX, but you would also need to find the color scale equivalents for any tweaks made to color values and their timings, which can be incredibly time consuming.
Beyond workflow simplification, the Initial Color Module allows us to introduce color variation with an option flag, which the Color Over Life module lacks.
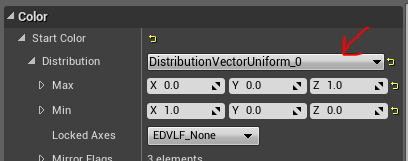
Let’s go back to the Initial Color Module and open up the color section, change the distribution to Uniform, and set values of 0,0,1, and 1,0,0.
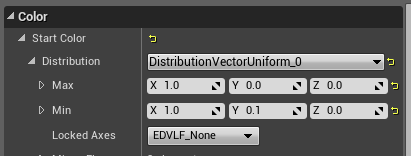
This yields a very interesting result in which the particles have a chance to get the color blue, the color red, or any of the values in-between those hues. If the hues you want are close enough together this can add some really great variation to your effects. Let’s change that to 1,0,0 and 1,.1,0 to see the difference.
Now we have a really nice saturated orange, which is slightly different each time the particle spawns, occasionally going to red.
But, let’s say my Art Director really wants to see a mix of complimentary colors, so I absolutely need blue and orange. No problem. Cascade can handle that for you, in one emitter.
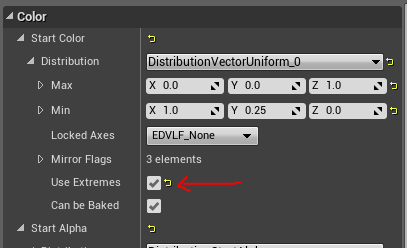
Let’s go in and change our values to 0,0,1 and 1,.25,0, but this time, look for the check box below the uniform vector distribution that says Use Extremes.
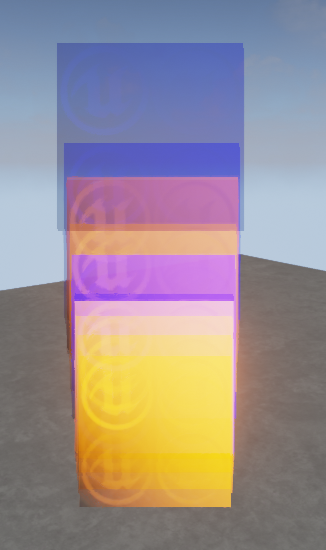
Check that box, and your particles will only spawn in as Blue or Orange - nothing in-between! Try changing your Spawn Rate to 10 and see the random color assignment!
So, the Initial Color module, combined with the Scale Color/Life module gives us two features we would not have with the Color Over Life module.
ONE: Our color settings are no longer directly associated with time, decoupling them gives us the ability to easily Scale color values in a range that you can also pre-determine/calculate if necessary. You can always ensure that your hue is correct and scaling by values you define directly.
TWO: By using a Uniform distribution we can add more variation to the color in our FX with one emitter, which reduces draw call expense and reduces the odds of potential sorting issues.
The power of decoupling these attributes will become even clearer later on when I get into modifying values with a particle parameter and a Blueprint at runtime.
I hope that helps you as much as it has helped me!

