Matinee Basics: Skeletal Meshes
Contents
- 1 Part One: So What Exactly Is A Skeletal Mesh?
- 2 Part Two: How to Find A Skeletal Mesh In The Browser
- 3 Part Three: How To Create A New Skeletal Mesh Group In Matinee
- 4 Part Four: How To Clear Or Assign A Skeletal Mesh To An Existing Skeletal Mesh Group.
- 5 Part Five: Positioning A Skeletal Mesh
- 6 Part Six: Animating A Skeletal Mesh
- 7 Conclusion
The goal in this tutorial is to teach you the basics of using skeletal meshes in Matinee. You’ll learn how to connect and manipulate skeletal meshes & make skeletal meshes animate.
Part One: So What Exactly Is A Skeletal Mesh?
In every day terms, a skeletal mesh is simply a class of mesh that can be animated. The characters and weapons you see in cinematics are skeletal meshes. Here is a slightly more technical definition:
Skeletal meshes are built up of two parts, a set of polygons composed to make up the surface of the skeletal mesh and a hierarchical set of interconnected bones which can be used to animate the polygons.
Skeletal meshes are often used in Unreal Engine 4 to represent characters or other animating objects. The 3D models, rigging and animations are created in an external modeling and animation application (3DSMax, Maya, Softimage, etc), and are then imported into Unreal Engine 4 and saved into packages by using Unreal Editor's Content Browser.
Part Two: How to Find A Skeletal Mesh In The Browser
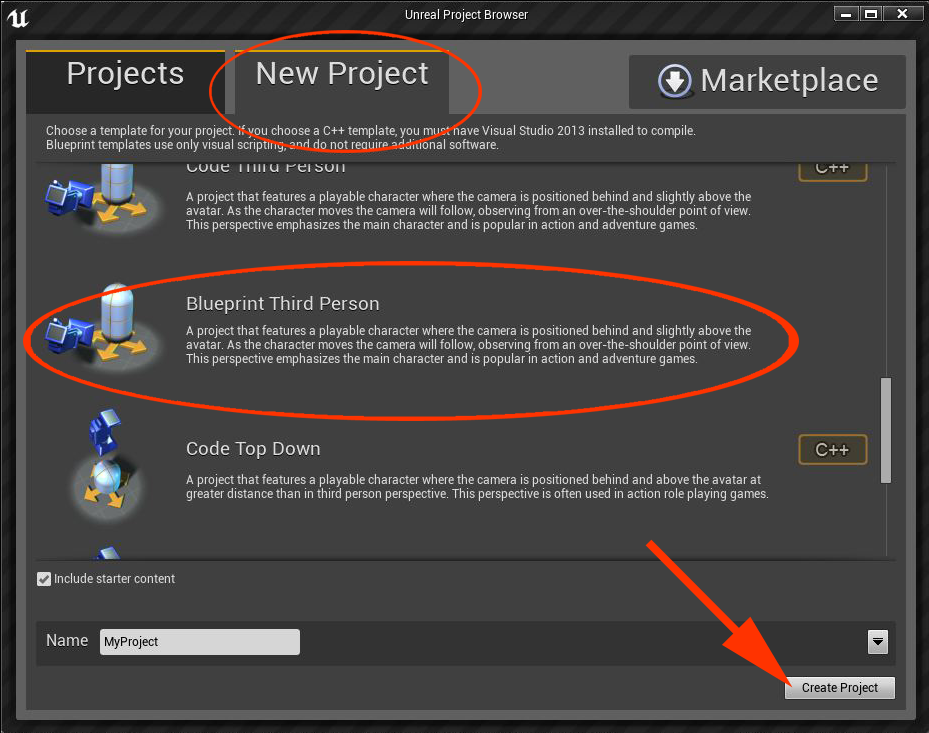
Create and open a Blank Project in UE4. Use Blueprint Third Person for this tutorial.
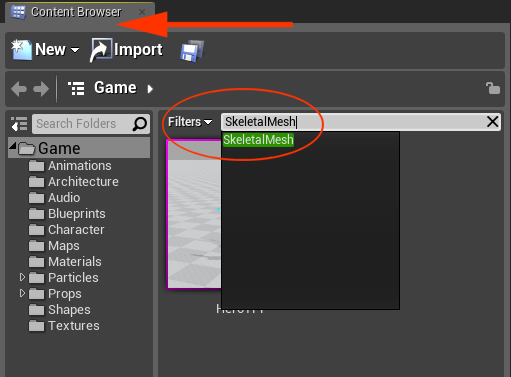
Go to the content browser Search Toolbar and type in 'SkeletalMesh'.
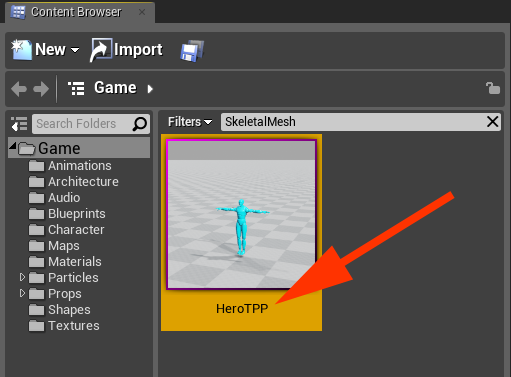
You should now see the HeroTPP skeletal mesh appear in the content browser.
Part Three: How To Create A New Skeletal Mesh Group In Matinee
Creating a skeletal mesh group in Matinee is easy. However, hooking the skeletal mesh up to the skeletal mesh group can be handled two different ways. Let’s look at the most basic method first.
Start by creating a new matinee sequence. If you need assistance creating a new sequence, take a look at the UE4 tutorial: Matinee Basics: Creating Your First Matinee Sequence.
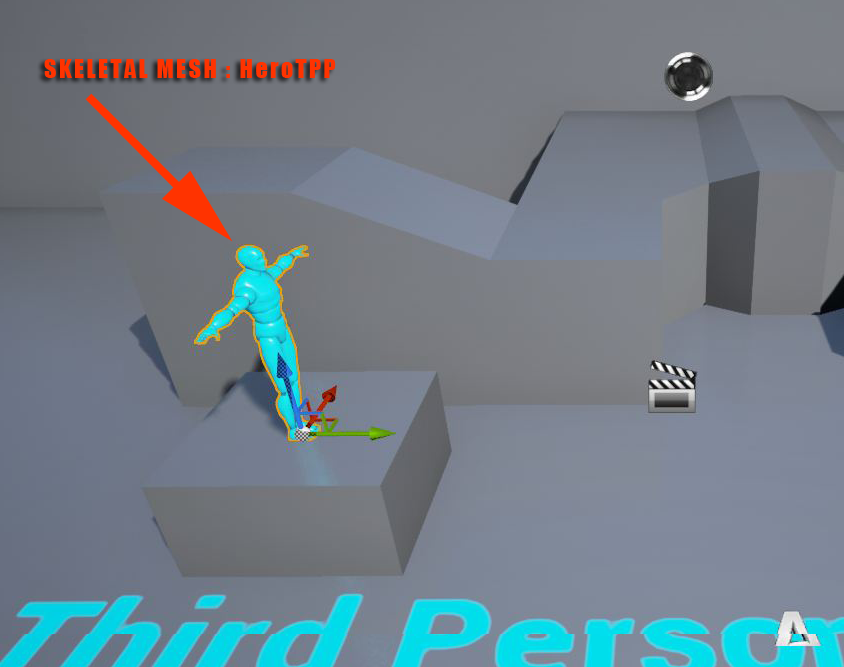
Next, drag or add skeletal Mesh HeroTPP into an editor viewport, preferably so that the character is near a ground plane.
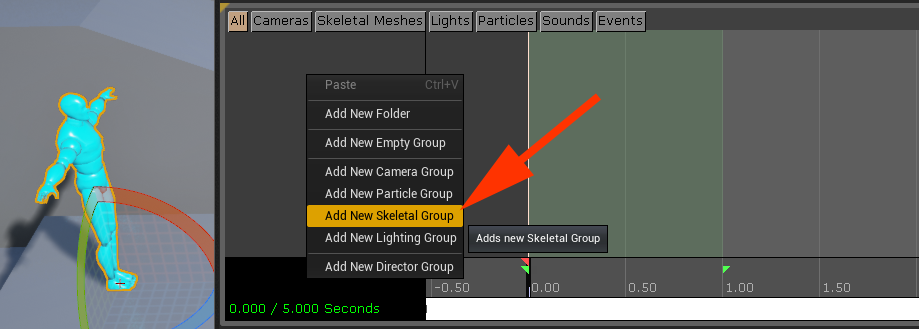
Open the matinee sequence. Make sure the skeletal mesh is still selected and highlighted when you created the new skeletal mesh group. If it is still selected then go to the Matinee and right click in the dark area just under the Track View tab.
A drop down menu should pop up. You have a selection of Groups to choose from. Select “Add New Skeletal Group”.
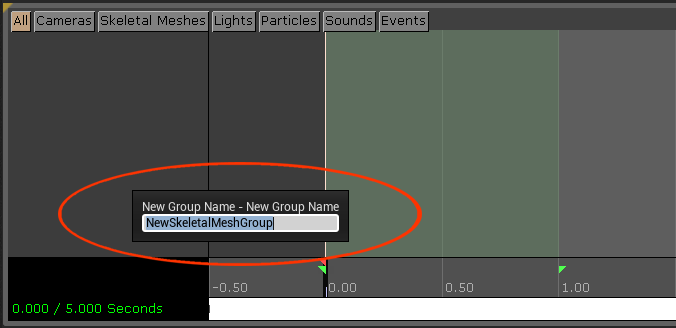
You can also name your new Group here if you like – I left the group name (NewSkeletalMeshGroup) as is for now.
When finished adding the new skeletal mesh group it should look like this:
Part Four: How To Clear Or Assign A Skeletal Mesh To An Existing Skeletal Mesh Group.
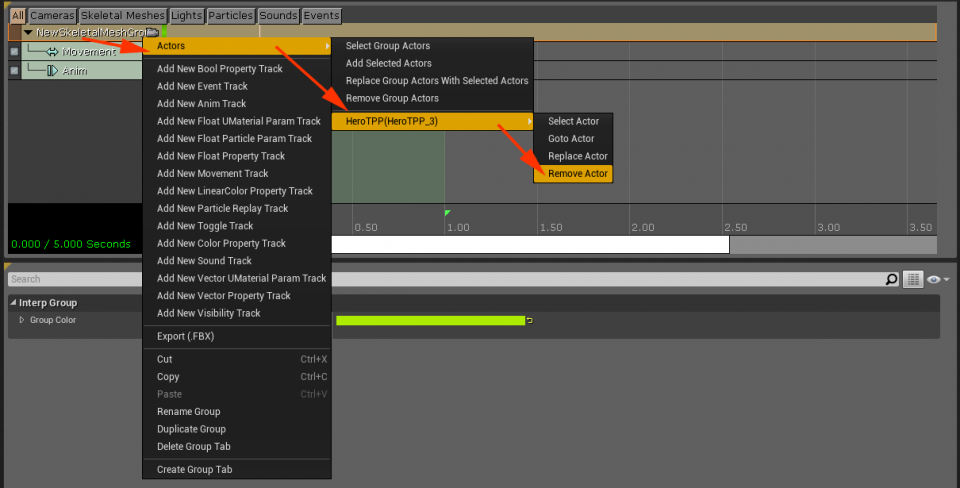
You just learned how to add a new skeletal mesh group in Matinee. The skeletal mesh you had selected was automatically assigned to the newly created group because you had the mesh selected on creation. Now you will learn how to remove the skeletal mesh from the group. Right click on the skeletal mesh group (NewSkeletalMeshGroup) in the timeline and a drop down menu will appear with many track types listed. Select “Actors” from the list and you’ll see more options appear. Select: HeroTPP(HeroTPP_3) Then: Remove Actor.
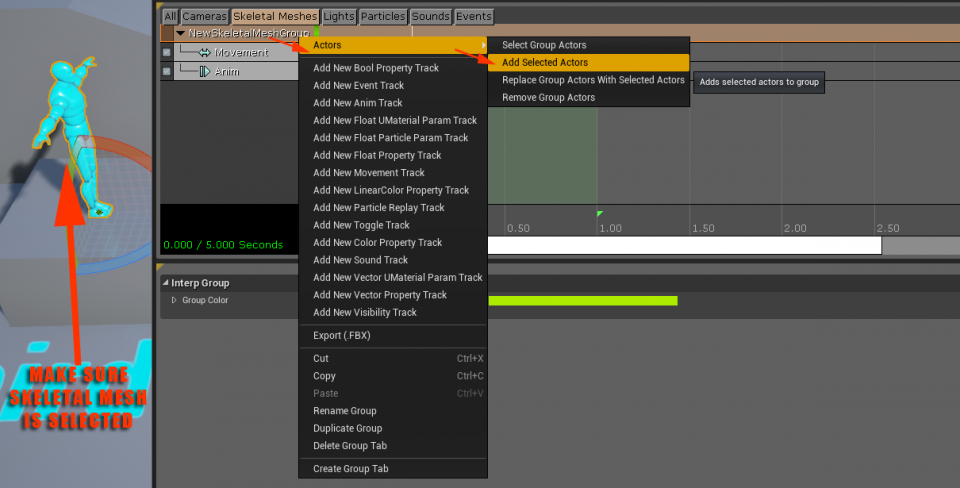
Once completed the skeletal mesh actor HeroTPP should no longer be associated with the skeletal mesh group. To add the skeletal mesh actor back to the group first select the skeletal mesh actor in the level so it becomes highlighted. Next, right click on the skeletal mesh group in the timeline and a drop down menu will appear with many track types listed. Select “Actors” from the list and you’ll see more options appear. Select: Add Selected Actors.
When completed correctly you should be able to click on the skeletal mesh group and see the actor become highlighted in the level. You can now add and remove skeletal mesh actors as needed to a matinee.
This knowledge becomes especially useful down the road when dealing with multiple skeletal meshes or updating the mesh you want Matinee referencing.
Part Five: Positioning A Skeletal Mesh
To manipulate the skeletal mesh in the level, you will need to manipulate its movement key frame. You can always add more key frames if more than one position is needed.
This key frame contains the positional data of the skeletal mesh (translation and rotation) where it currently sits in the level.
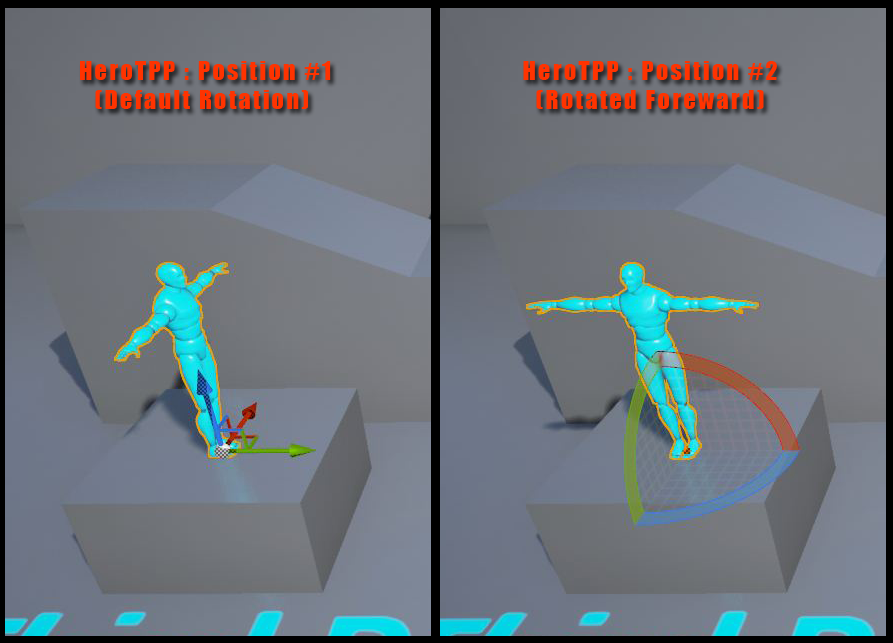
Let’s start by manipulating the data of the first key frame in the movement track. Click on the first key frame in that track at 0.00. Change the values of that key by manipulating the associated object in the world (HeroTPP). With the key frame selected go to the viewport and simply rotate the skeletal mesh so that it faces forward.
Tip: I suggest making each key frame you create have an interpolation mode of constant so that the character doesn’t slide (interpolate position) over time. The constant setting just means the character or object will not interpolate from its position until the matinee reaches a new key frame in the timeline.
You might actually want the character to interpolate between positions on some occasions, but at least now you understand the role of the constant key. The shortcut for setting a movement key frame to constant is simply the 5 key
Part Six: Animating A Skeletal Mesh
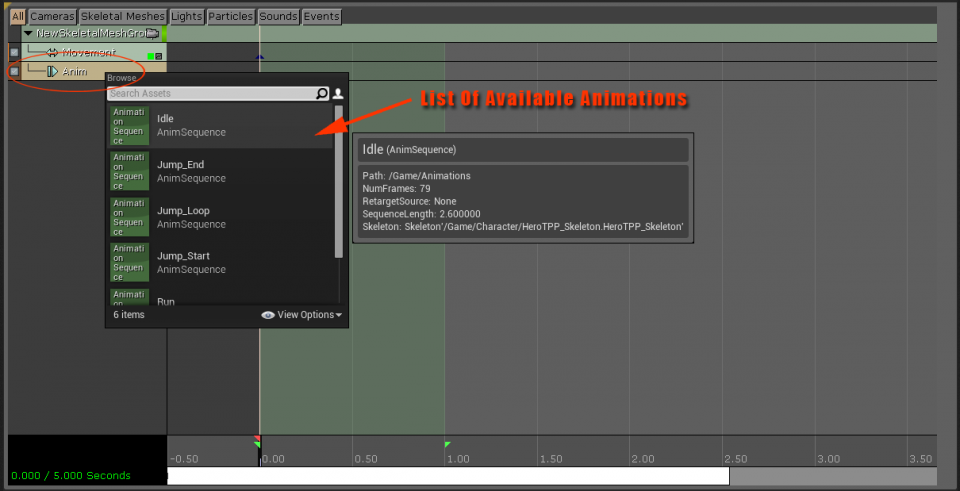
To get your skeletal mesh HeroTPP character animating all you have to do is select the anim track under the new skeletal mesh group and hit the Add Key button. You can also just use the Enter key to add a key.
A list of available animations will then appear. Note that the animation is added wherever the time bar is located. In our Example the time bar is at 0.00.
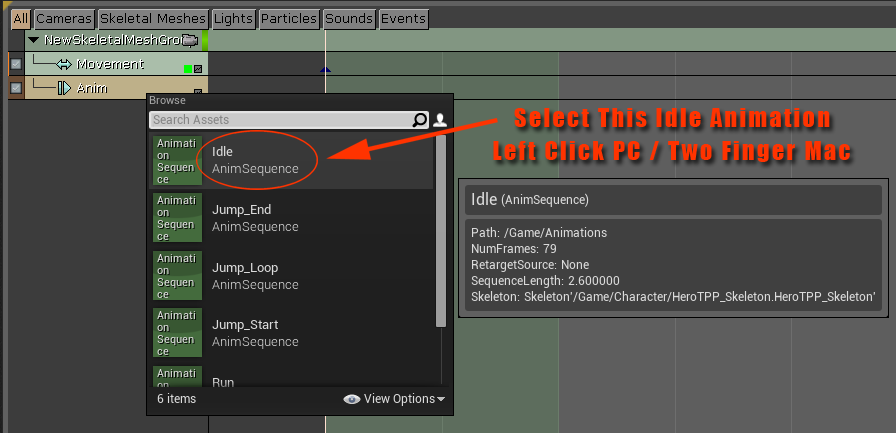
Choose the first animation in the list called Idle and left click.
The animation will then be added to your timeline.
The blue bar represents the length of the animation from start to finish. The time bar is scrubbed to 1.00 seconds into the animation.
When you scrub forward in time you will see the current time change from 1.00 seconds to 1.27 Seconds.
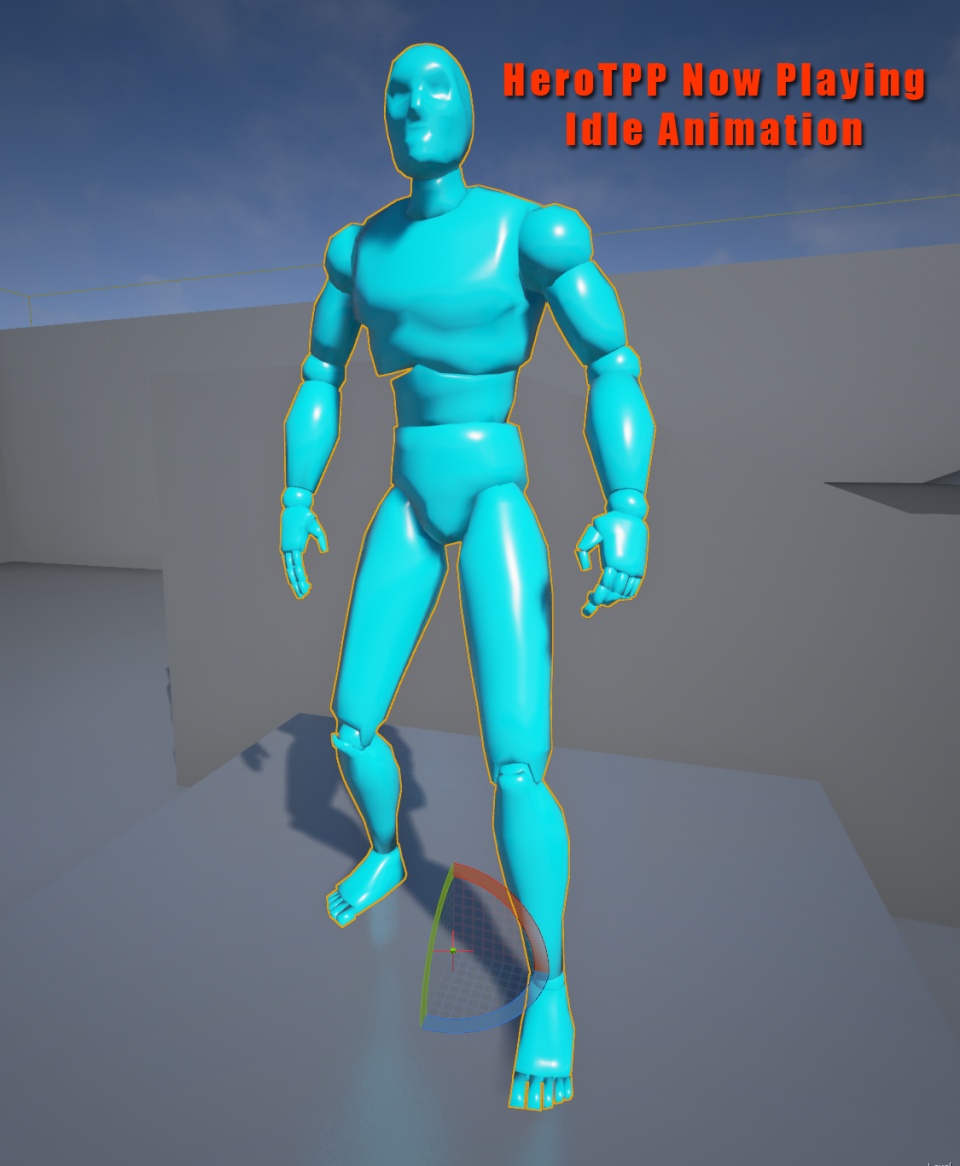
If you scrub the timeline back and forth you should now see the skeletal mesh HeroTPP animate in the world and he should no longer be in a T-pose.
Conclusion
You should now have a better understanding of how we add, move and animate skeletal meshes through Matinee. I strongly suggest playing with the different character animations and moving the skeletal mesh around the level just to learn more about Matinee. I also suggest adding a camera to your matinee and actually filming the animated skeletal mesh to see what you can come up with. Good luck!
