Parallax Occlusion Mapping
Parallax Occlusion Mapping
This tutorial is a simple example of how to set up Parallax Occlusion Mapping (POM). It is assumed the user has an intermediate understanding of the Material Editor and its associated terminology.
Parallax Occlusion Mapping or (POM) is an enhancement of the parallax mapping technique. Parallax occlusion mapping is used to procedurally create 3D definition in textured surfaces, using a displacement map (similar to a topography map) instead of through the generation of new geometry.
I will be giving a brief explanation of the inputs being used, but if you want a more in depth explanation head to the http://www.twitch.tv/unrealengine/v/34107433 and listen to Ryan Brucks go into greater detail on the POM Function.
Assets Used
The textures used in this example are T_CobbleStone_Pebble from the Starter Content pack. You will also want a somewhat curved plane mesh for the material function to work well for this example. I have attached the example mesh in this tutorial below.
Material Outcome
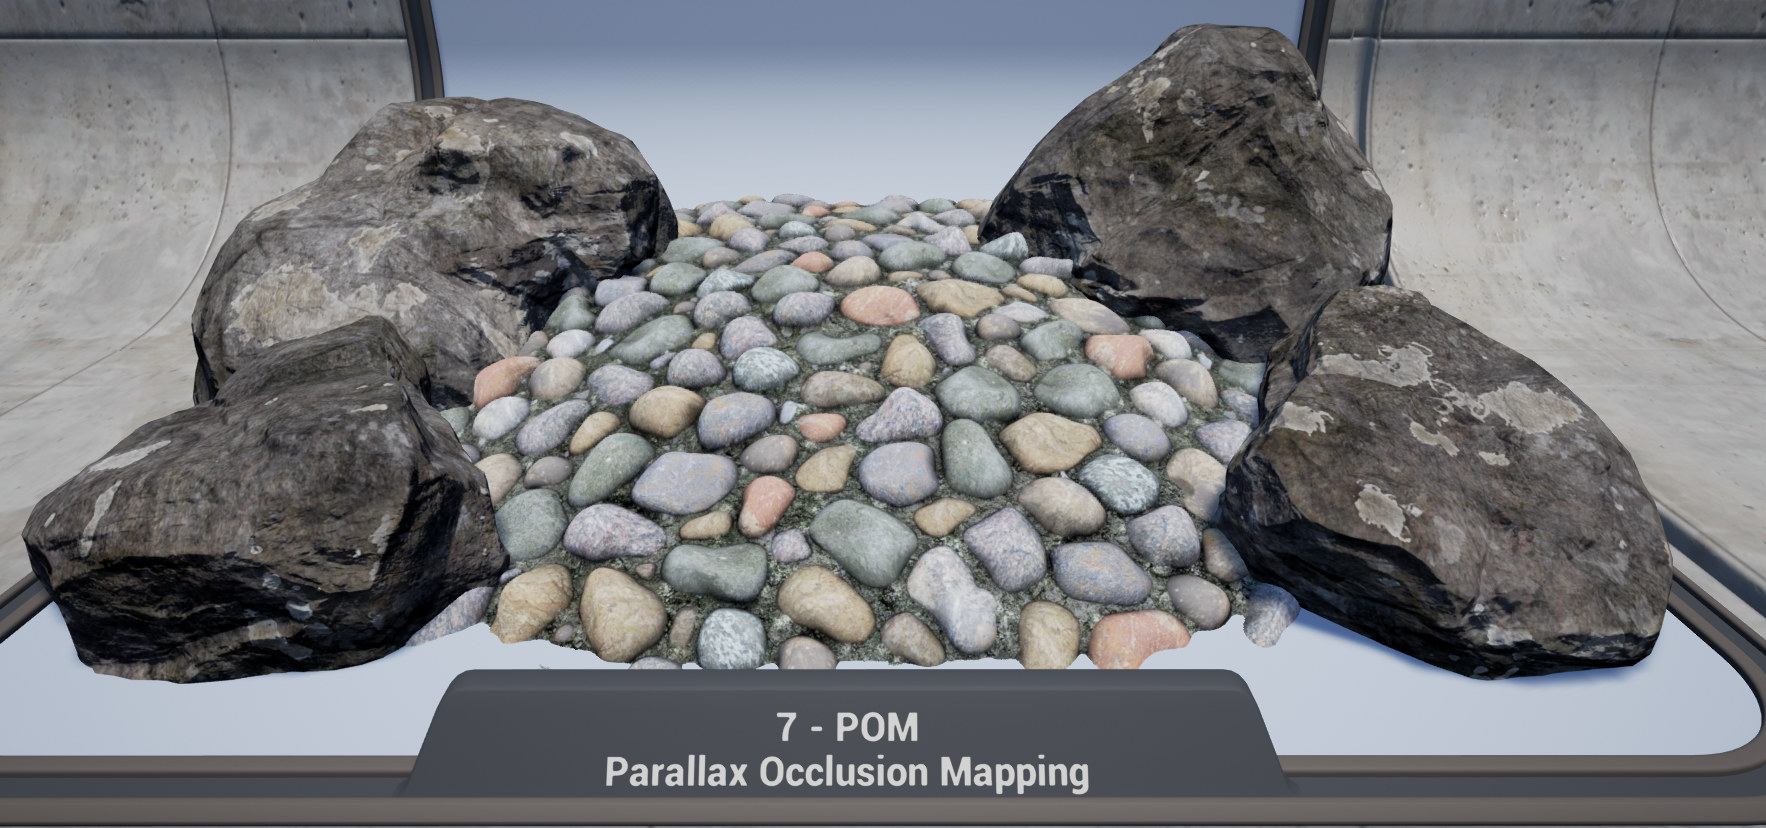
Here is an example of what your outcome will look like. This is a simple example of how POM can be used as a filler around large objects like rocks and pillars.
Steps to Follow
1. Create new blank project with Starter Content.
2. Import the attached mesh (or your own if you have one).
3. In the Content Browser locate the 'T_CobbleStone_Pebble_M'
4. Right-click on the texture sample and choose the 'Create Material' option.
5. Within the Material Editor graph, right-click and type 'Parallax' and select the 'Parallax Occlusion Mapping' material function.
6. Hold the 'S' key and left click to create a Scalar Parameter. You will want to create 5 of these.
7. Right-click the texture sample 'T_CobbleStone_Pebble_M' and convert it to a texture object and plug it into the 'Heightmap Texture(T2d).
8. Take one of your Scalar Parameters and name it 'Height of Texture' and plug this into the 'Height Ratio' input.
This will define the height your texture will appear to be "lifted"
9. Take another one of your Scalar Parameters and name it 'Min Steps', give it a value of 8.0, and plug it into the Min Steps input.
    The Min and Max steps affect the quality of the function as specific view angles.
    Specifically the amount of steps required to reach the effect.
    Ryan Brucks provides a more in depth explanation of this on the twitch stream.
10. Create a 'Multiply', 'Lerp', and 'Dither TemporalAA' node.
11. Name another Scalar Parameter 'Max Steps' and the other 'TempAA Step Multiplier'
12. Plug the 'Dither TemporalAA' node into the 'Alpha' of the 'Lerp' and the 'TempAA Step Multiplier' into the 'B' input.
This is done to reduce artifacts when used in combination with TemporalAA.
13. Plug the output of the 'Lerp' into the 'B' of the 'Multiply' and the 'Max Steps' to the 'A' input.
14. Plug the output of the 'Multiply' into the input of 'Max Steps'
This is to help increase accuracy and quality when looking at the meshes surface at flat angles.
15. Create another 'Multiply' and give the 'A' input a 'TexCoord' and the 'B' input a Scalar Parameter named 'Tiling'. Plug this into the 'UVs(V2)'.
This will allow you to modify the texture tiling.
16. Now create a 'Vector4' parameter and name it 'Channel'. Set it's values to 1,0,0,0.
17. Create an 'Append' node and connect the sRGB output from the 'Channel' parameter to the 'A' and the 'Alpha' to the 'B'. Plug the 'Output' from the 'Append' to the 'Heightmap Channel(V4)' input.
18. Now create a 'DDX' and a 'DDY' node.
    These will be connected to the Multiply from the 'TexCoord'
    and plug directly into the Normal texture sample. This is
    also done to reduce artifacts when calculating Mips.
19. Create a 'Static Bool Parameter' and name it 'Specify Manual Texture' and plug this into the relative input of the POM node. Set the default value to 'False'.
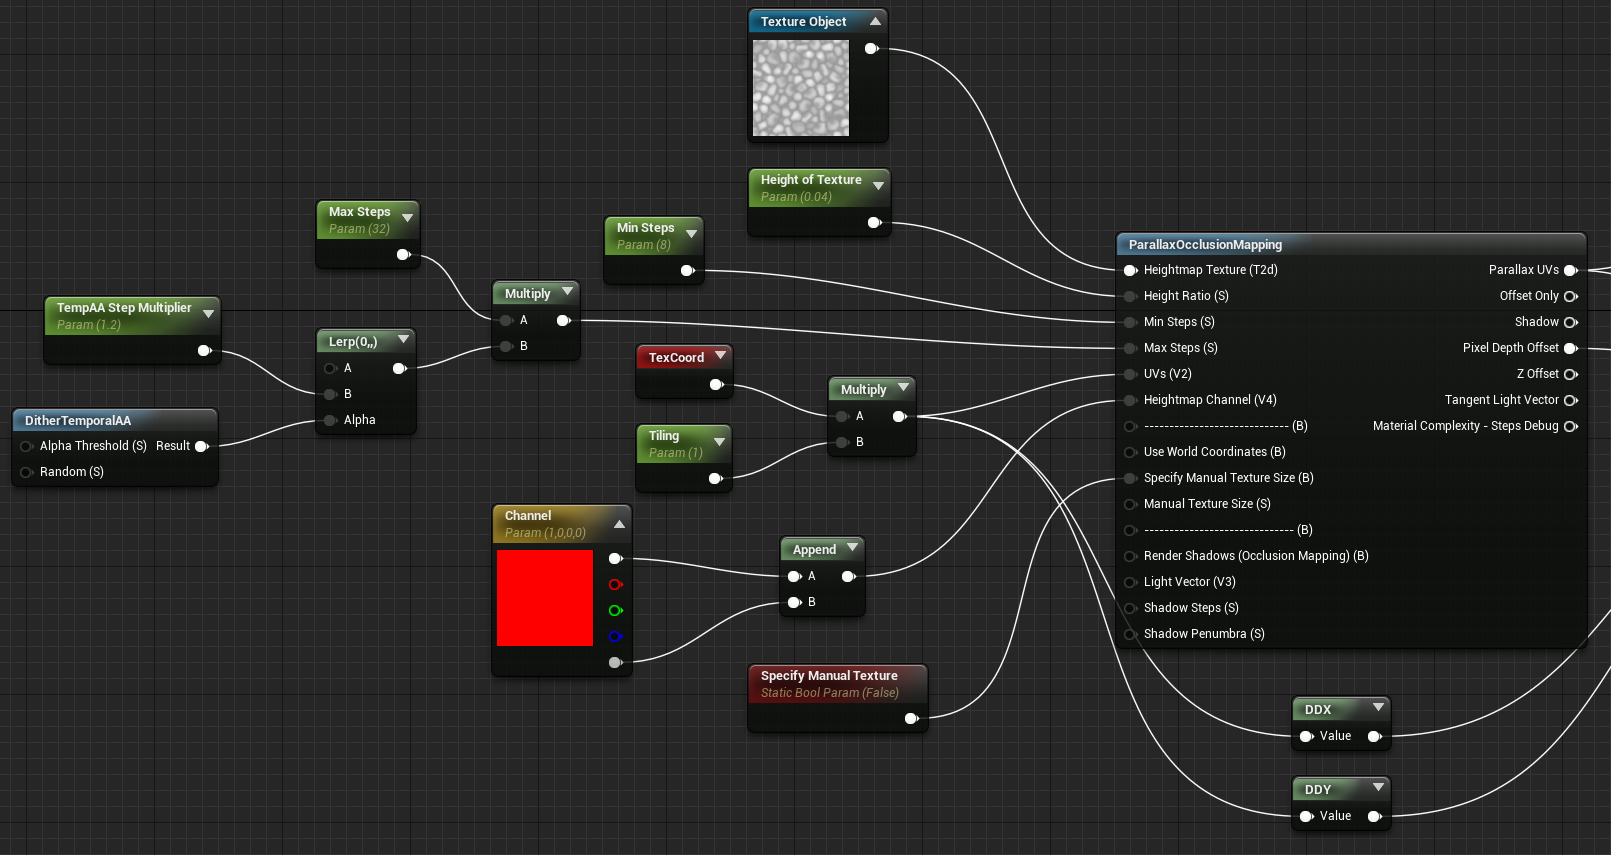
Your material graph should look something like the below image thus far. If you are having trouble viewing the image you can click on it to navigate to the original file to view the largest size.
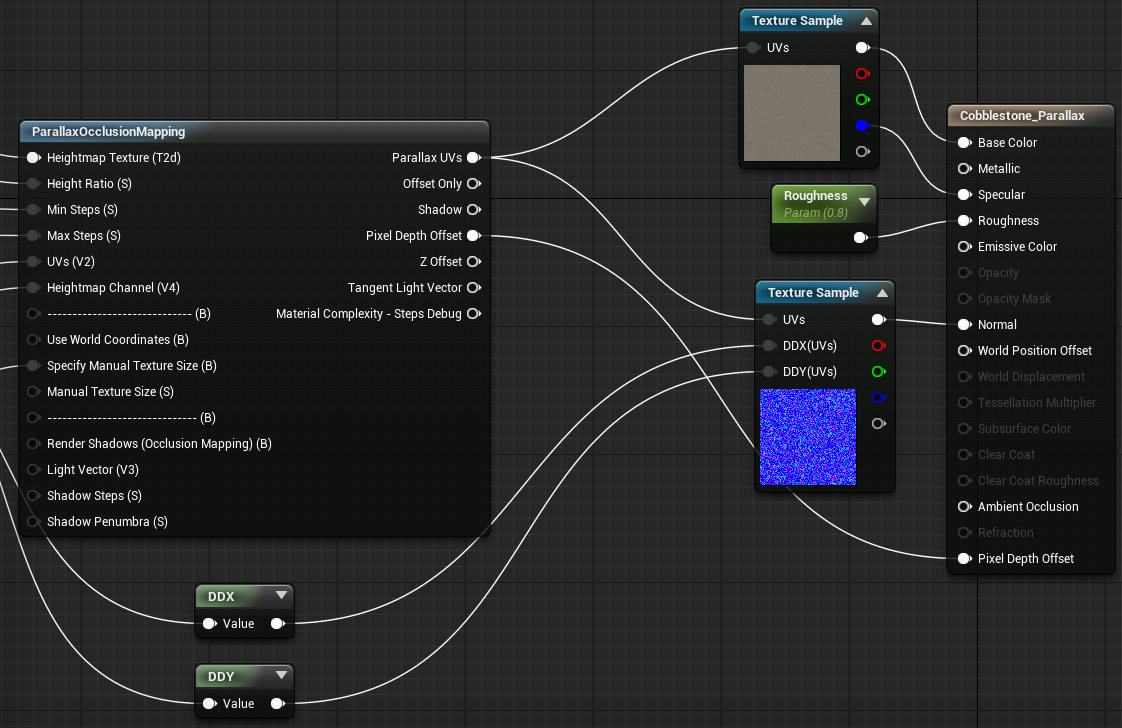
20. Now drag the 'T_CobbleStone_Pebbles_N' and the 'T_CobbleStone_Pebbles_D' texture samples into the material graph.
21. Plug the 'Parallax UVs' output from the POM function into the UVs of each texture sample.
22. Select the normal texture sample and change the 'MipValueMode' to 'Derivative'
23. Plug the output of the 'DDX' and 'DDY' into their relative inputs on the normal texture sample.
24. Plug the diffuse texture sample and normal sample into their respective inputs of the material.
25. Plug the 'Pixel Depth Offset' output into the same input of the material.
Congratulations, you have now successfully created a material using Parallax Occlusion Mapping! Now create a material instance and apply it to your mesh to edit your parameters and see how each one affects the outcome.
Keep in mind, this is an expensive function in itself so you need to use it wisely.
- Note - You might need to disable shadow casting on the mesh to get the correct visual effect. This is because the shadows are not accounting for the offset height and still trying to cast a shadow using the original mesh. There are ways to change this using the bottom half of the POM function, but that will be for another time! Goodluck and have fun making some awesome materials!
Thanks for following along! I have written some more tutorials you can check out by following the links within my Wiki Profile page found below.


