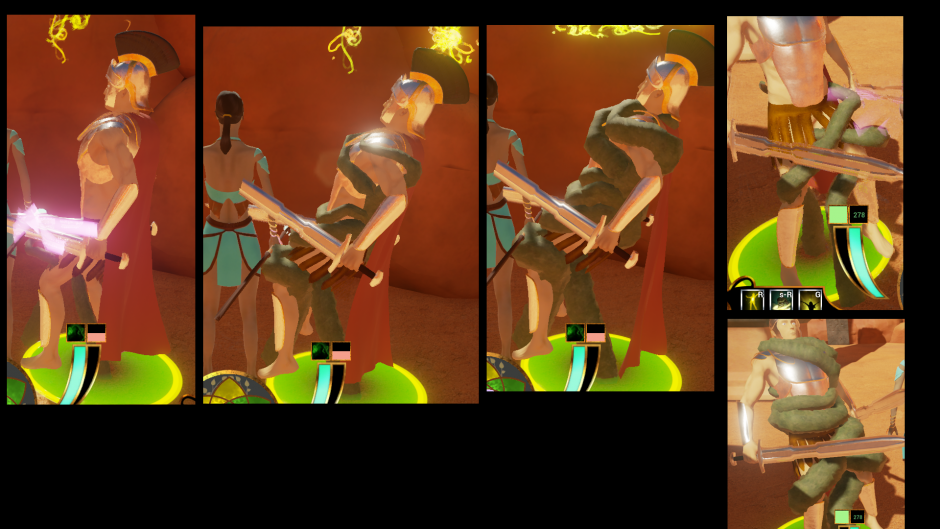
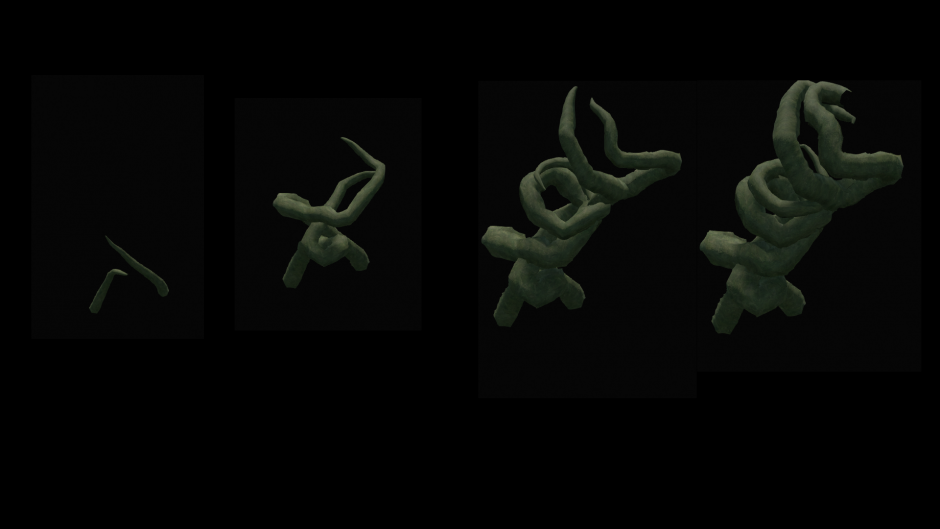
Vines wrapping around an object
Contents
Overview
In this tutorial, I show how to quickly create an animation of vines wrapping around an object animation without the use of morphs/vertex animation. The tutorial is split into two parts: first we prepare the meshes and UVs in 3ds Max (or any other program), followed by the magic done in Unreal Engine 4. We do a lot of "cheating" to produce animation, namely we will use masks, panned textures and pixel displacement to accomplish the effect. In the end, we wrap the effect with an appropriate blueprint. Here is in-game result
Creating vines around the object in 3ds Max
Import the object that we want to wrap with vines for visual reference. In our case, this is a character in "stuck in vines" pose. You can later animate this pose a bit to add variety on character. You can use something simple as well, like a wall if you want to simulate vines that grow up the wall effect.
We now create vines wrapping the object:
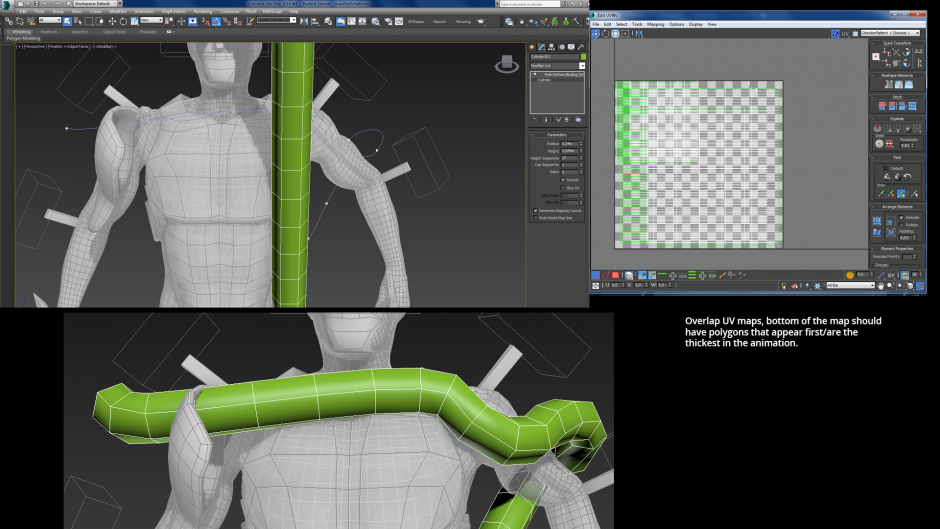
- create a few splines that wrap the object nicely. Use bezier points (right click on vertex, convert to bezier) for smoother results.
- for each vine, create a cylinder and add modifier Wrap To Path (use move to spline). Adjust the cylinder's height, segments and radius. 10 segments around the cylinder usually suffices, and as many height segments as needed for the result to use smooth enough. Iterate back to curves if needed. You can hide the cylinders to adjust paths and unhide them when you are done. Make a separate copy at this stage because you may need it for further tweaking. The process after that is destructive.
- when everything looks nice, set the radius of each cylinder to really small value. I use 0.001 (1 mm). This makes them very thin indeed. In UE4, we will use displacement along normal to make them thick again where needed but we need to export them like this.
- convert all cylinders to Poly meshes and attach them together (Add Object when in Poly Mesh). Rename combined object appropriately.
- add Unwrap UVW modifier, select all faces and rescale the maps to object size in unwrap editor. This will make the texture distribution uniform along all elements. Place unwraps of each element (previously each cylinder) to appropriate location according to the time they appear in the animation: placing them higher in Y makes the appear later (and smaller). I usually put smaller vine parts at the top. Make sure the unwraps are also correctly oriented (the top part of unwrap should correspond to the end of the vine). The end result should be tightly overlapped unwraps.
- export Vine object to FBX
Creating a vines material effect
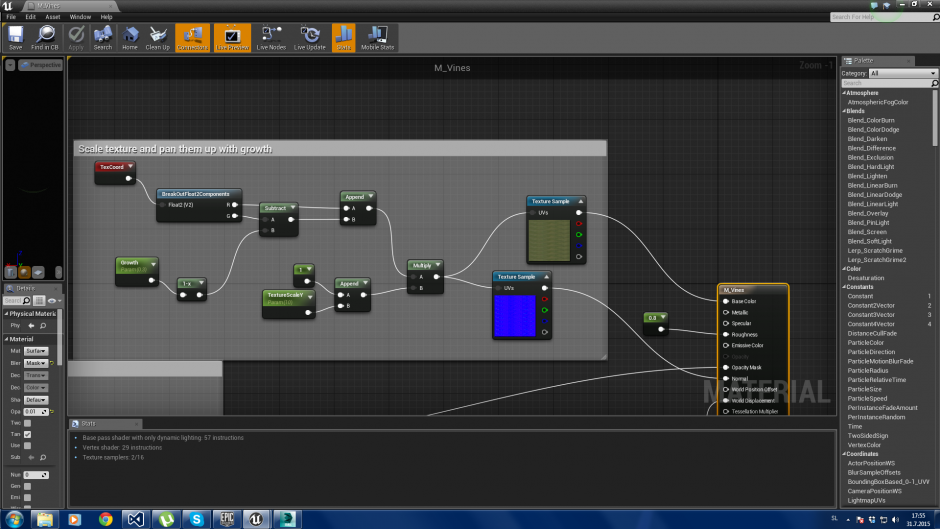
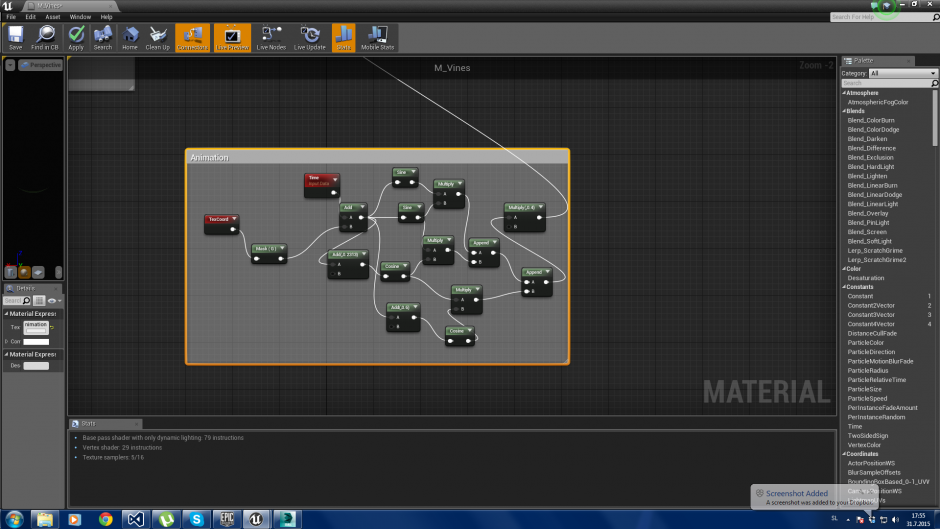
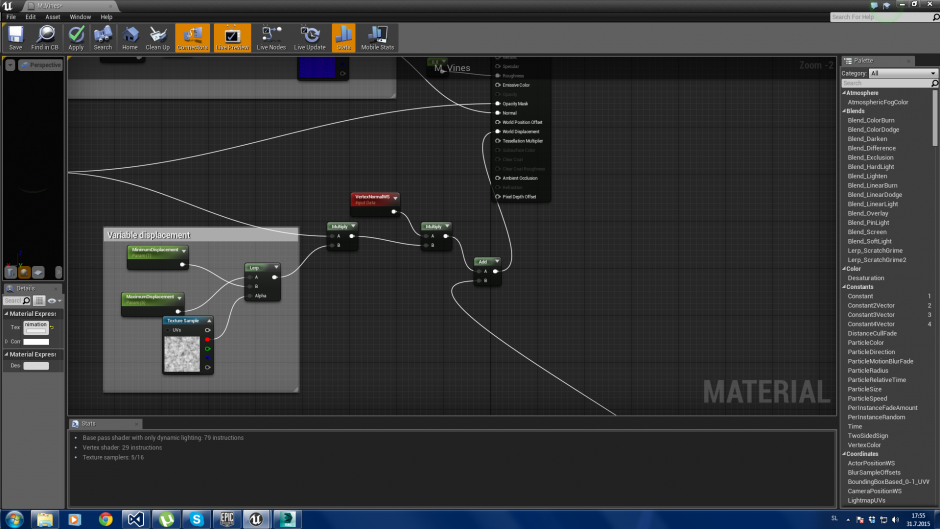
Import the vines mesh to UE4 and create an empty material M_Vines. The complete material is given in the picture. Here are tricks I use:
- Use material setup: masked, enable adaptive displacement, use triangles and without holes.
- I use seamlessly tiled texture for the the diffuse and normal map. I scale the texture coordinates in Y direction (I use value around 10, change it until it looks good) because the unwrap is very uniform.
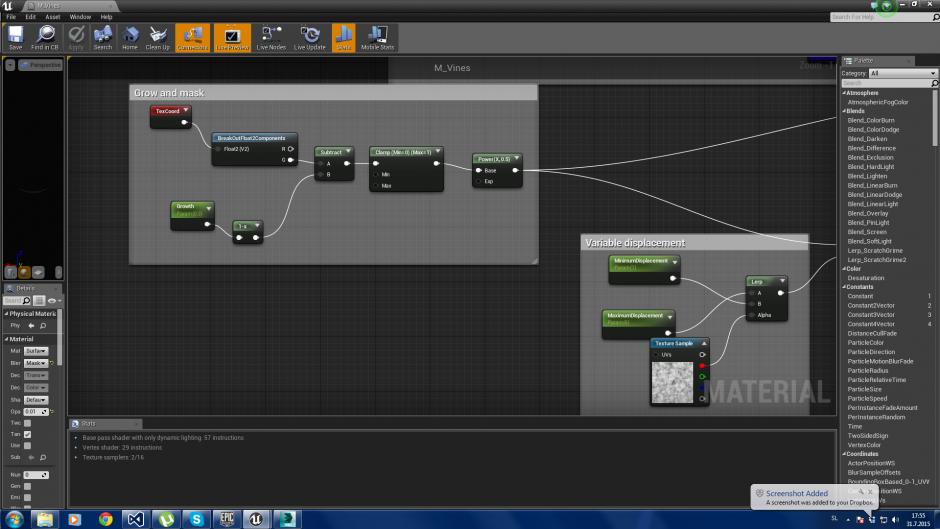
- The scalar parameter Growth is used to specify how big the vine is. I subtract the texture coordinate Y (green) from Growth and clamp it to range (0,1; this creates a mask for the animation effect. Where the mask is 0, the object should not be shown, so I put this pin to Opacity Mask material input and set clipping value in material properties to a small value, like 0.05.
- The Growth mask is also used to displace the vertices outward; I use power before applying displacement to get a non-linear displacement along the vine. Simply use normal multiplied by the mask and the maximum displacement at that position to achieve that effect. Additionally, the maximum displacement at the current position is calculated by lerping two values by noise: this creates some definition on the vine.
- We want the vines to appear to be moving up, therefore we use the same Growth to displace the diffuse and normal textures in Y direction.
I recommend creating a material instance and specifying custom preview mesh (the vines). There, you can play with parameters to see the effect and the animation.
Animating in a blueprint
Simply place the vines mesh and apply the material. On BeginPlay, create dynamic material instance, and start a timeline. I have a curve named Growth that grows linearly in 1 second from 0 to 1, and I apply this value to dynamic material's parameter Growth on each update. The advantage of using timelines is that you can pause or reverse it at any time (on destroy event, for example when only half of the growth animation is done).
Additional tricks
Additional tricks you could use:
- Use color channel or another texture to paint maximum displacement (instead of noise map)
- You can add animation to vines. I have done so by adding "random" movement based on second UV coordinate and time: combination of sine multiplies with different periods looks chaotic enough.
- You can animate the size at each position: scaling the noise texture that controls the displacement along normals over time works nicely.
Enjoy!
Ziga
