Lighting and shading pbr part 1
I have been pretty focused on refining the lighting, shading, and texturing methods used throughout Steel Harvest's prototype level lately, and I feel like it's time to share some of the things I've learned. This is part one of an unknown number of lighting and shading articles.
OVERVIEW
The first and most fundamental topic to over is: physically-based rendering (PBR). This is something everyone should be aware of and familiar-"ish" with, but it's absolutely critical to understanding more complex lighting and shading topics in the long-term. Most of this information will be within an Unreal Engine context (strictly a metallic-focused workflow, despite the peripheral support of a specular component), but given that I've used Unity (which has options for metallic-based and specular-based workflows) for ages and ages, I'll try and draw parallels where I can.
PBR is intended to provide game developers (artists, developers, tech. artists, etc.) with a way of working with materials in-game that properly simulate the physical properties of light. The end result of this workflow and rendering environment is generally a more natural look but, just as importantly (if not more so), it ensures a consistent look across your entire season regardless of the lighting situation.
DETAILS
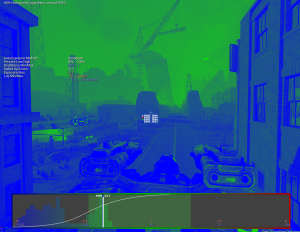
A more important (in my mind) benefit of this approach is that, theoretically, you're just creating physically-accurate materials. So, if you emulate the natural properties of that real-world material that they represent, you're ensuring that your scene tonemapper and eye-adaptation don't have to account for an enormous range of luminance values that could occur if you just kind of "wing" the whole "lighting thing". This will become very, very useful as you start to balance your scene in a dynamically-lit environment. See below:
By keeping your materials based on their real-life equivalents, you are - in the grand scheme of things - saving yourself a fair amount of headaches. This is somewhat tangential to the lighting/shading topic, so I'll be brief. With this consistent development practice, you have a lot of options on how objects interact with the environment, since you will have a material reference for collisions/interactions to base the response on. We use this in Battle Machido to determine the ballistic response to an impact with a collider; depending on the physical material, the projectile may ricochet or pass-through to cause further mayhem. The gist: a well thought-out, consistent approach to your game's core systems can span rendering, shading, physics, and gameplay. The More You Know! *rainbow*
Back to the actual lighting and shading part of this post. The first step I took to help me make the scene's shading more consistent was to establish a standard shader (I use this word with 'material' pretty interchangeably) set from which all of my individual materials are based upon. This is one of those moments where I must dive into Unreal Engine 4-specific talk. Creating all of these standard materials -- for which you'll have about six-seven master materials to cover, say, 80% of your total needs -- will take a fair bit of time to initially compose due to the fact that:
You may rely heavily on external packages that will need to be updated to fit your texture standard (more on that in a moment). Each master must support a variety of contextual texturing methods (such as blending with a terrain material to root objects in the ground smoothly), without bringing in extra complexity if such supported methods are not needed. You will likely want some albedo color adjustment tools included in your master material just in case, for certain scenarios, you need to slightly alter the hue of the image (or your height blended texture set). Some constants for material parameters that do not need their own dedicated texture or texture channel: specular, roughness, and metallic (sometimes a single value is enough) for instance. These (all but specular) are best used by specifying a texture for their input, but it's not required -- especially for pure pure metals or nonmetals. The thing that is absolutely critical when writing these master materials and will be the bane of the actual development of them: rely on static switch parameters like they are going out of style. That is the only way that this approach can be performant. Otherwise you're going to be dragging a lot of (often) completely unnecessary features into each material which just makes for sad developers.
Now, part of this whole standardization process is refining your development and material tuning practices to ensure that you don't start making exceptions that become more and more common and eventually you start looking at your scene and there is a stark contrast between materials that were customized beyond the standard range of, say, specular or metallic values (it can be hard to force yourself to use 1 for metals and 0 nonmetals -- just resist the urge to tweak that).
Also, in general, all materials have a bit of specular. UE4's PBR implementation recommends your average specular value be set to 0.5. I tend to expose that parameter because, in the case of, say, terrain I want to make the specular component as subtle as possible (it's still non-zero, though).
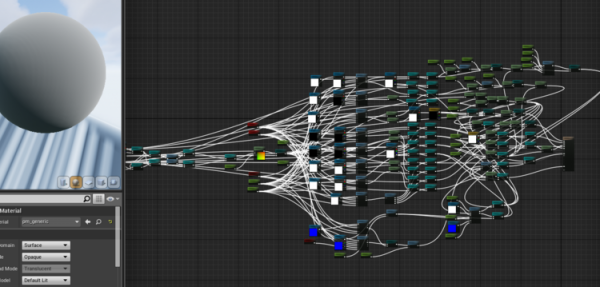
Earlier I mentioned how critical static switch parameters were for keeping each material instance's complexity under control. The downside is that your material graph is somewhat more... Complicated. Just remember, the light at the end of the tunnel is that despite what you're about to see, the total sampler count is 2 and the total instruction count is 80. Which isn't bad for a fully detailed PBR material.
TEXTURE DATA SPEC
None of what follows is a necessity by any means. This is what I have found to be the best use of resources with the least performance overhead.
What I've found to be the most useful set of texture data is the necessities: albedo (please do not confuse this with a diffuse map, which has shading baked-in), normal, metallic, and AO map.
After reading a few (or a dozen or so) other papers on varying PBR implementations, I eventually decided that roughness map -- not a scalar parameter like I was accustomed to when I was dumb... or, you know, last week -- and a cavity map were what would fill the additional color channels in my "compact" texture. And then I remembered oh yeah a displacement map is helpful is pretty cool too. So that ended up in the alpha channel of the albedo texture. Alternatively, when needed, the alpha channel of the albedo would be used for an antialiased texture mask.
Additionally, since their use is much, much lower frequency, I use a single-channel grayscale emission map as-needed. That's about the only exception I've run into thus far.
MATERIAL EXPRESSIONS
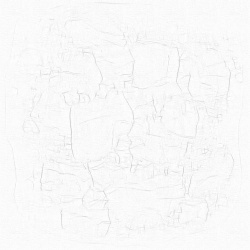
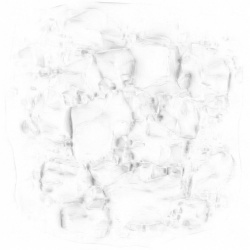
If you're not familiar with cavity maps -- as, to be honest, I was pretty hazy on. Essentially, it is the fine details of a mesh that the AO map doesn't fully emphasize well. And unlike the AO map, the cavity map is not intended to feed directly into the material output descriptor..
Instead, the cavity map is multiplied as the last step before the albedo goes into the material descriptor. Similarly, the last step before the specular value is fed into the material descriptor you should multiply it into the specular as well. Cavity Map AO Map The cavity map is, by far, the least essential texture in the mix. I like the subtle contribution it makes, personally, but it's not necessary. I'm still looking into what can be used to make a more useful contribution but I am fairly certain it's not necessary.
Other than those two exceptions, the rest of the material is actually pretty trivial.
COMING SOON
I'm going to be bringing the standard material set that I end up with and am mostly content with being public to the Unreal Marketplace within the next month or so, so hopefully that is of some use to people.
In the next post I make I'm going to cover Megascans. Because Megascans are the future. They are our savior. They shine a lot on the dark and a... Can't complete that thought.


