Mobile Water Material
Contents
Overview
In this tutorial we will be creating a water material to be instanced for use on mobile devices. This tutorial has been updated to integrate the newly added High Quality Mobile Reflections rendering feature which require a high end mobile device (e.g. iPad Pro).
    Be sure to download the texture files posted here on the page.
    Also be sure your Project Settings > Rendering > Allow Static Lighting is enabled.
    This is important for making sure reflections work correctly.
Texture Files
Files to download:
File:Water Texture Files.zip
Base Color
1. Create a new project blank blueprint project for Mobile/Tablet using Maximum Quality.
2. Import the two texture files downloaded from this page in the link above.
3. Create a new Material and drag in the two texture samples you imported into the Material Graph.
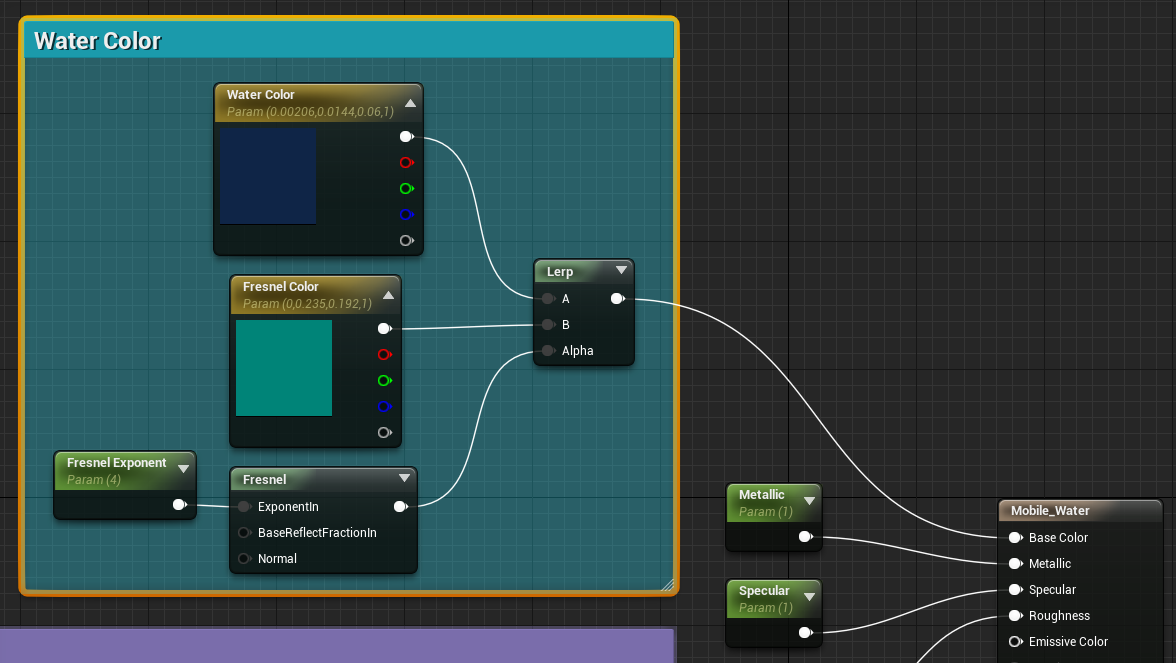
4. First create two new Vector Parameters to represent our waters colors by holding the 'V' key and clicking in an empty space within the material graph.
5. Now set the value of one to a darker blue and the other to a lighter blue.
6. Create a Lerp node by holding the 'L' key and clicking in the material graph.
7. Connect the dark color to the 'A' input of the Lerp, and the light color to the 'B' input.
8. Now create a Fresnel node by searching for the word in the palette.
9. Connect the Fresnel output into the Alpha input of the Lerp.
10. Create a new Scalar Parameter node by holding the 'S' key and clicking in the material graph. Name is Fresnel Exponent. This will control the falloff of the fresnel using the lighter blue color.
Normals
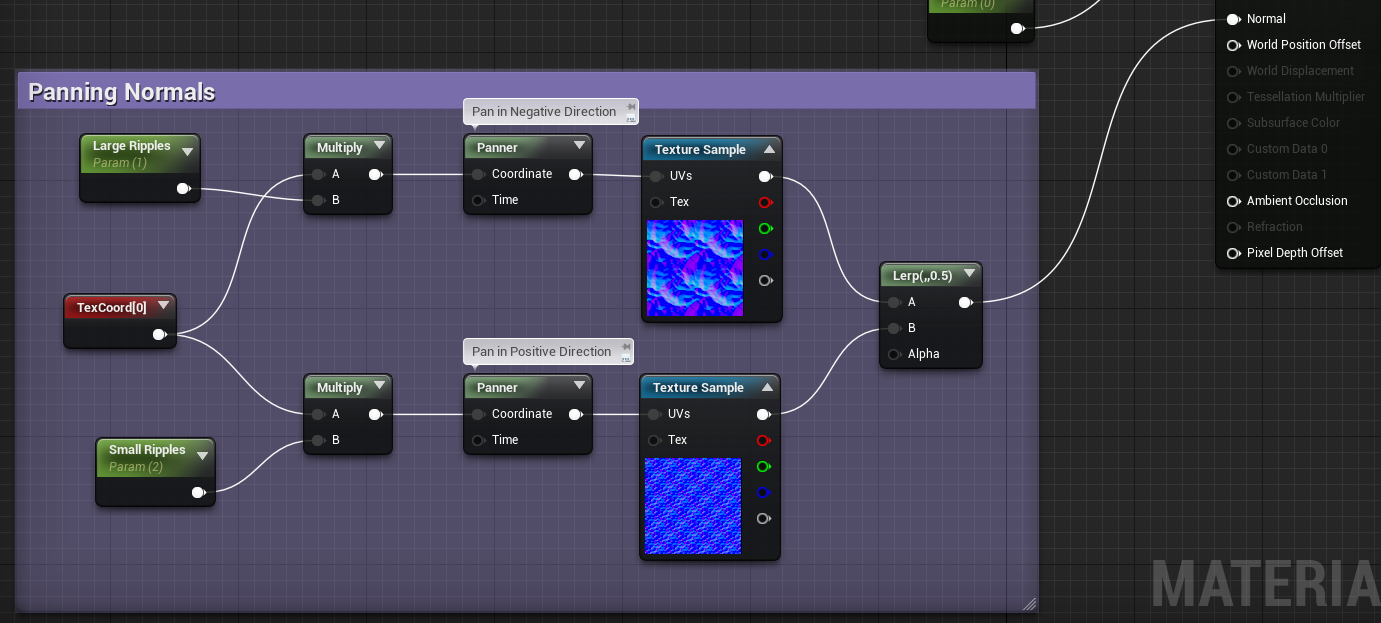
1. Next we need to create two panning nodes by holding the “P” key and clicking into an empty area of the graph. This adds the effect as if the water were moving.
2. Plug the UV’s of the normal maps into each of their own panner.
3. Set the Values of one Panner to be negative along the Speed X & Speed Y coordinates, and set the other panner to positive values. I used (-.04, -.04)(.04, .04)
4. Create a TexCoord node by holding the 'U' key and clicking in the material graph.
5. Create two new multiply nodes by holding the 'M' key and clicking in the material graph. These will help give control over the size/tiling of the normals when we instance the material.
6. Create two new Scalar Parameters. Name one Large Ripples and One Small Ripples.
7. Connect the TexCoord into the 'A' input for both Multiply nodes.
8. Connect the Large Ripples parameter to one 'B' input, and the Small Ripples parameter to the other 'B' input.
9. Now plug the Large Ripples multiply into the Coordinate input for its Panner, and the Small Ripples multiply into other Coordinate input.
10. Create a new Lerp and connect the two normal texture samples into the A and B inputs.
11. Plug the output of this Lerp into the Normal input of the Material.
Scalar Parameters and Material Properties
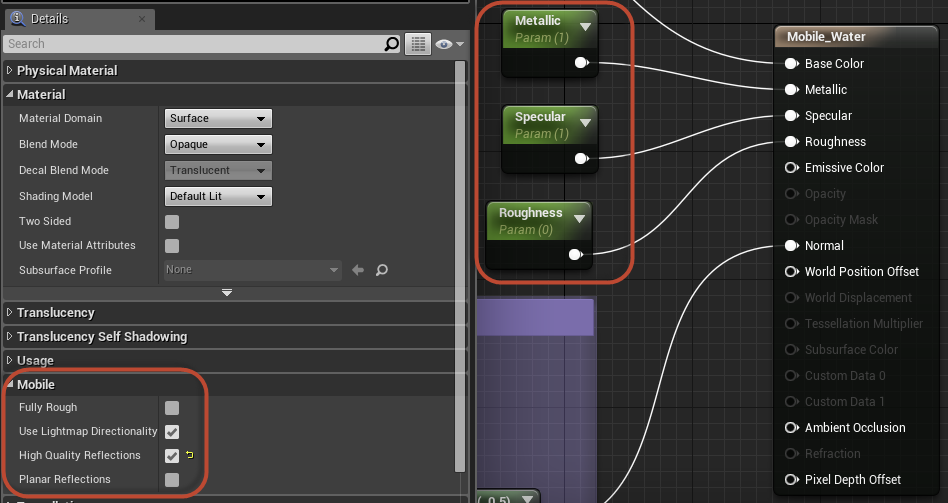
1. Now create three new Scalar Parameters.
2. Name one Specular, Roughness, and Metallic and plug them into their respective inputs.
3. In the Details tab of your Material be sure to enable Mobile > High Quality Reflections
Scene Setup
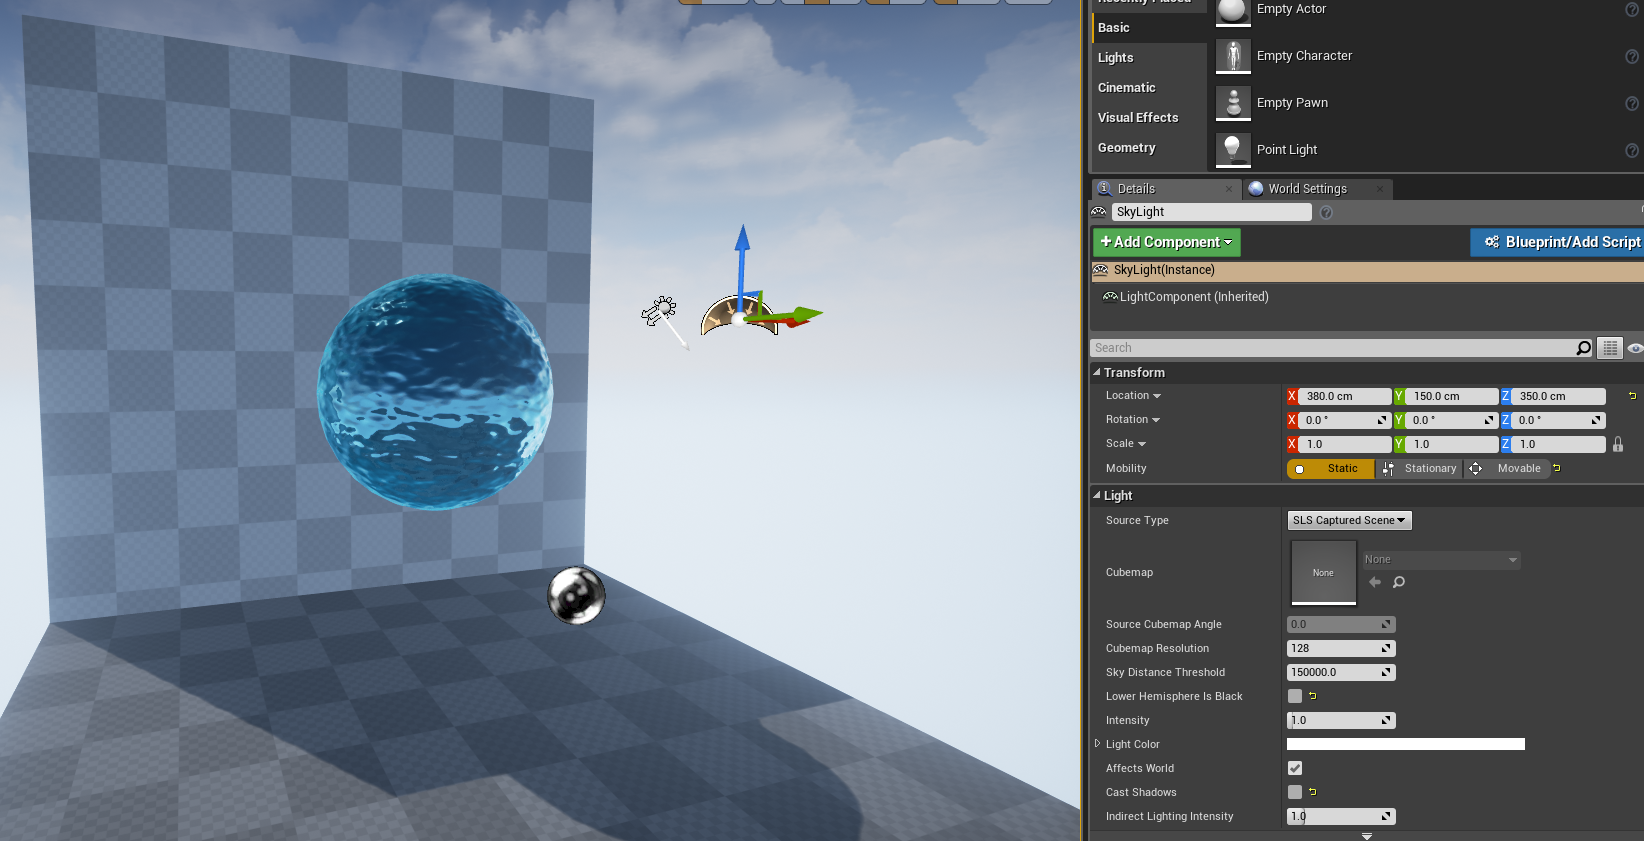
1. Add a Skylight and set its mobility to 'Static'
2. Disable 'Lower Hemisphere is Black' and 'Cast Shadows'
3. Set the Directional Light to 'Stationary'
4. Drag a Sphere mesh from the Modes > Basic tab into the scene.
5. Add a Sphere Reflection Capture and place it around the sphere to capture the reflections.
Final Result
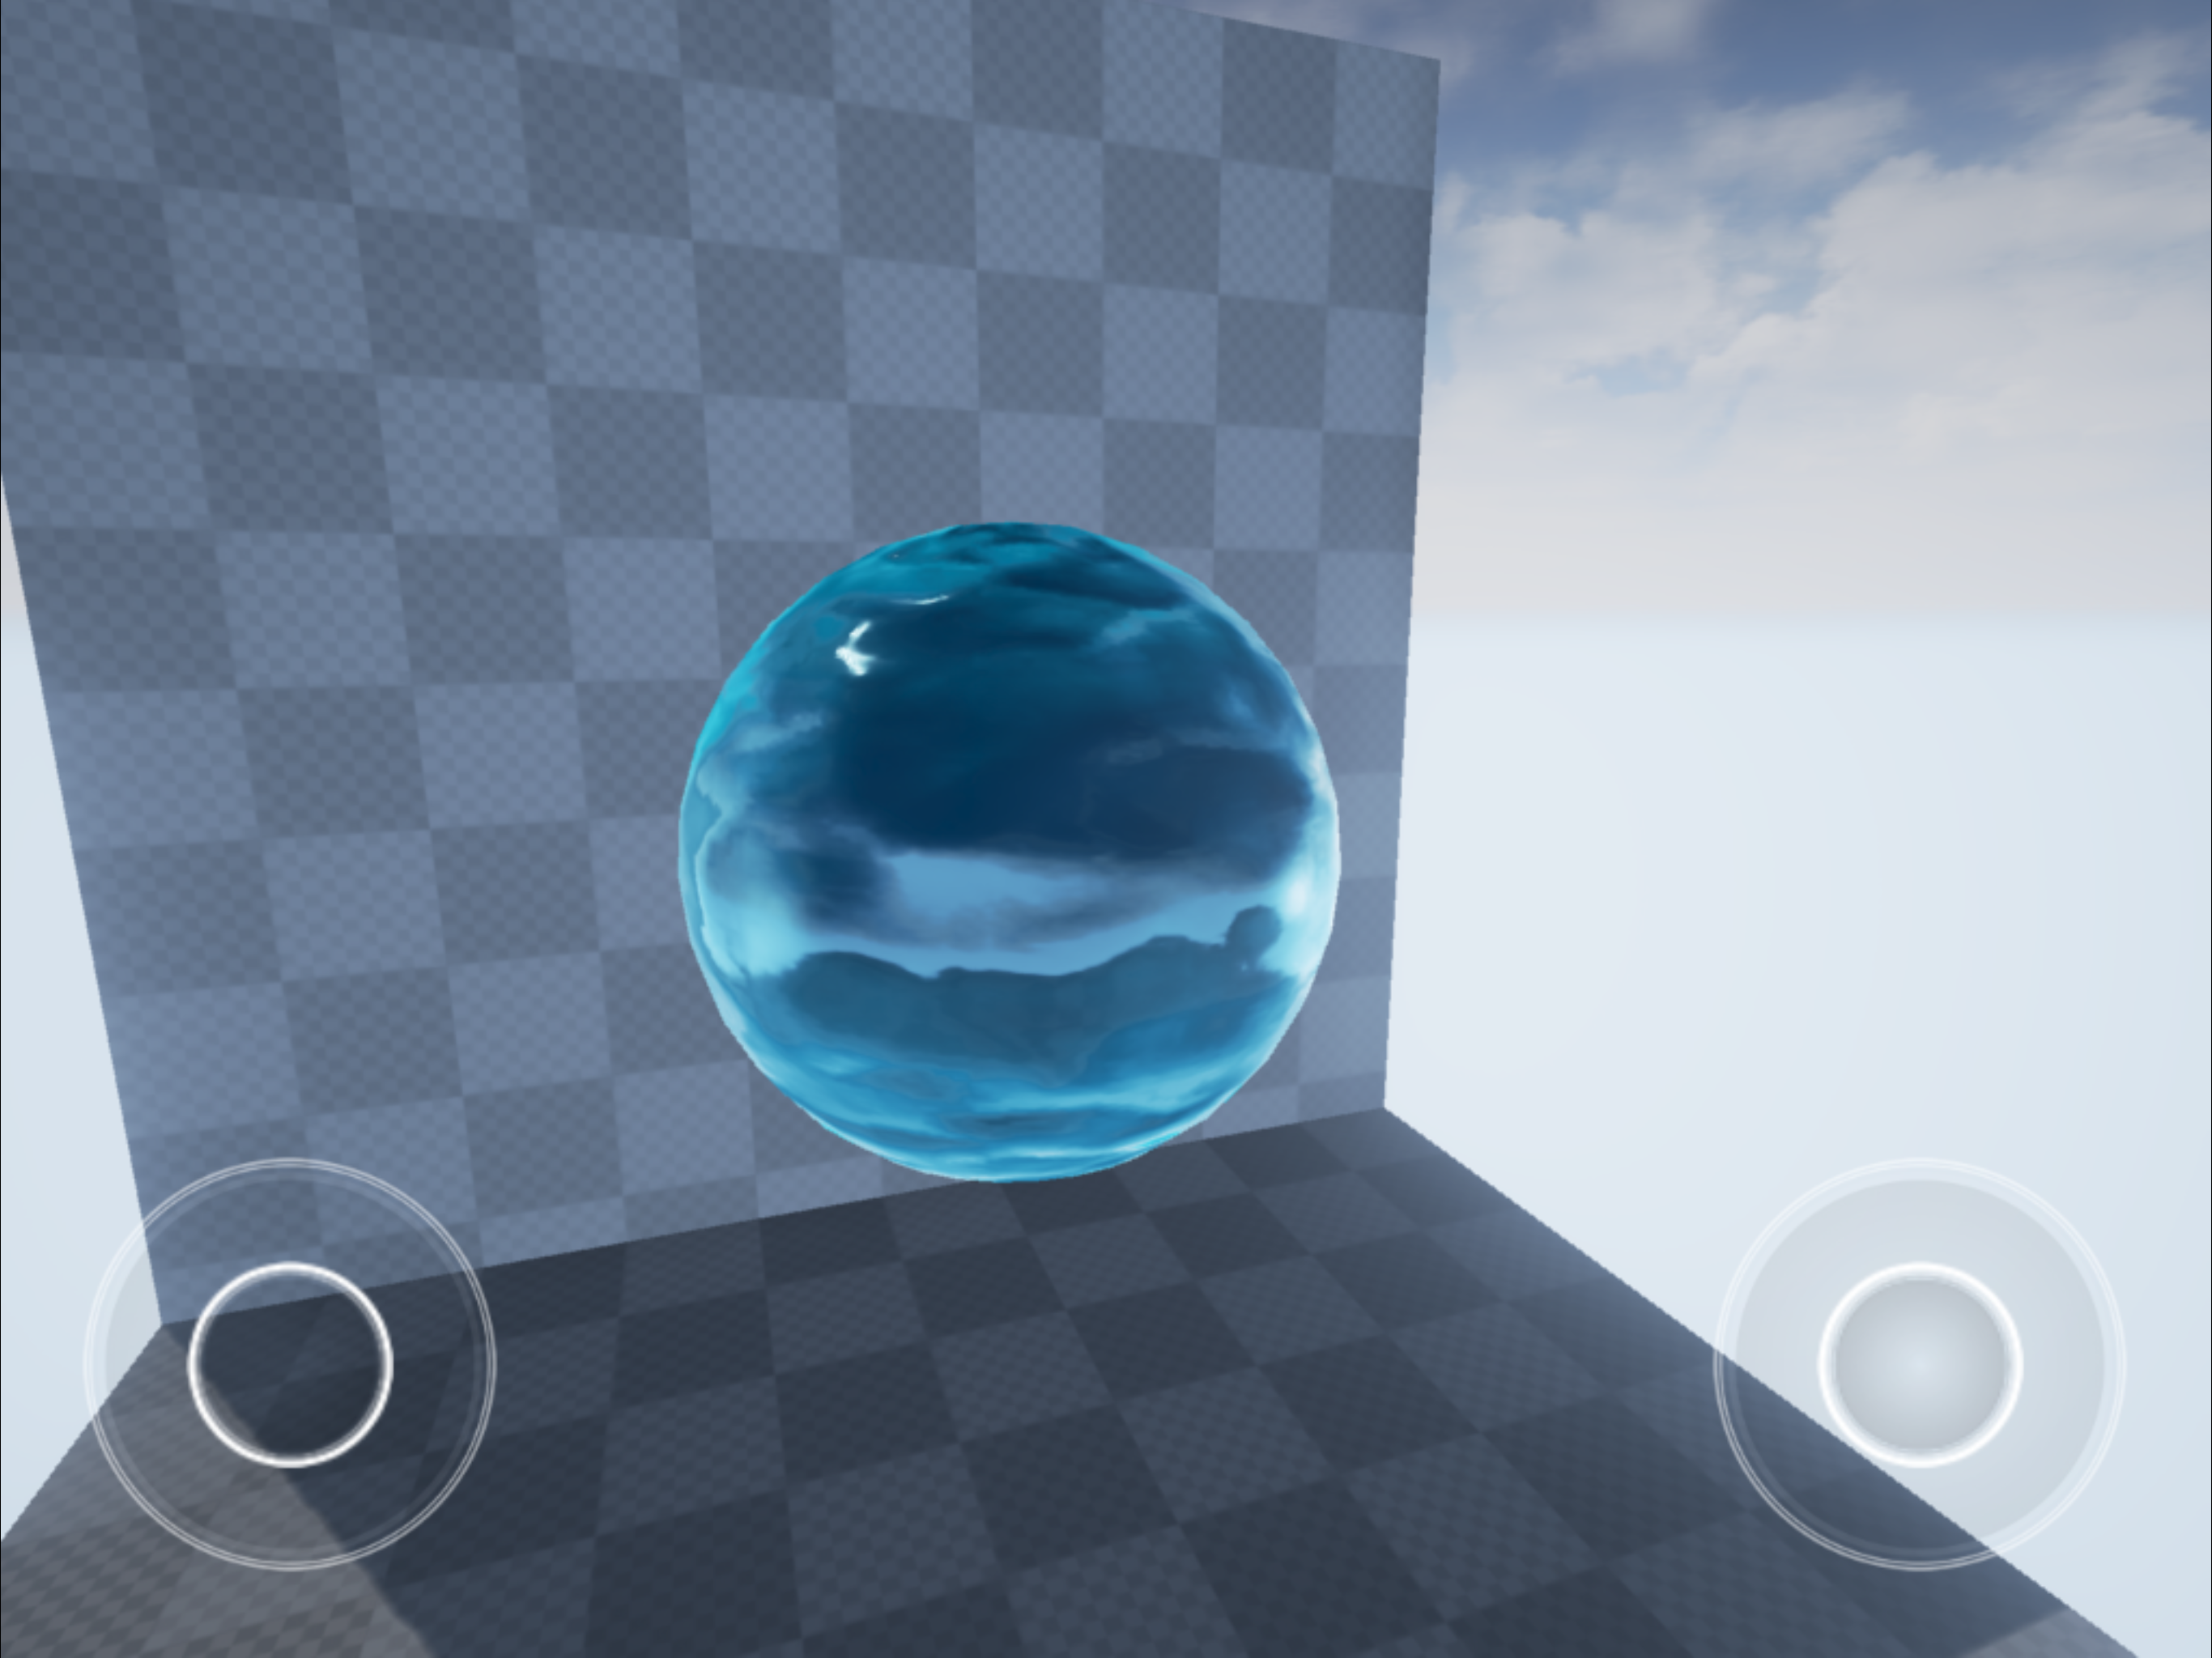
Your final outcome should look something like the below when deployed to a high end mobile device. Keep in mind I applied the material as an instance and messed around with the parameters to get the desired effect.
Thanks for following along! I have written some more tutorials you can check out by following the links within my Wiki Profile page found below.
