Creating Cosmetic Items
Hats
Hat Creation Guidelines
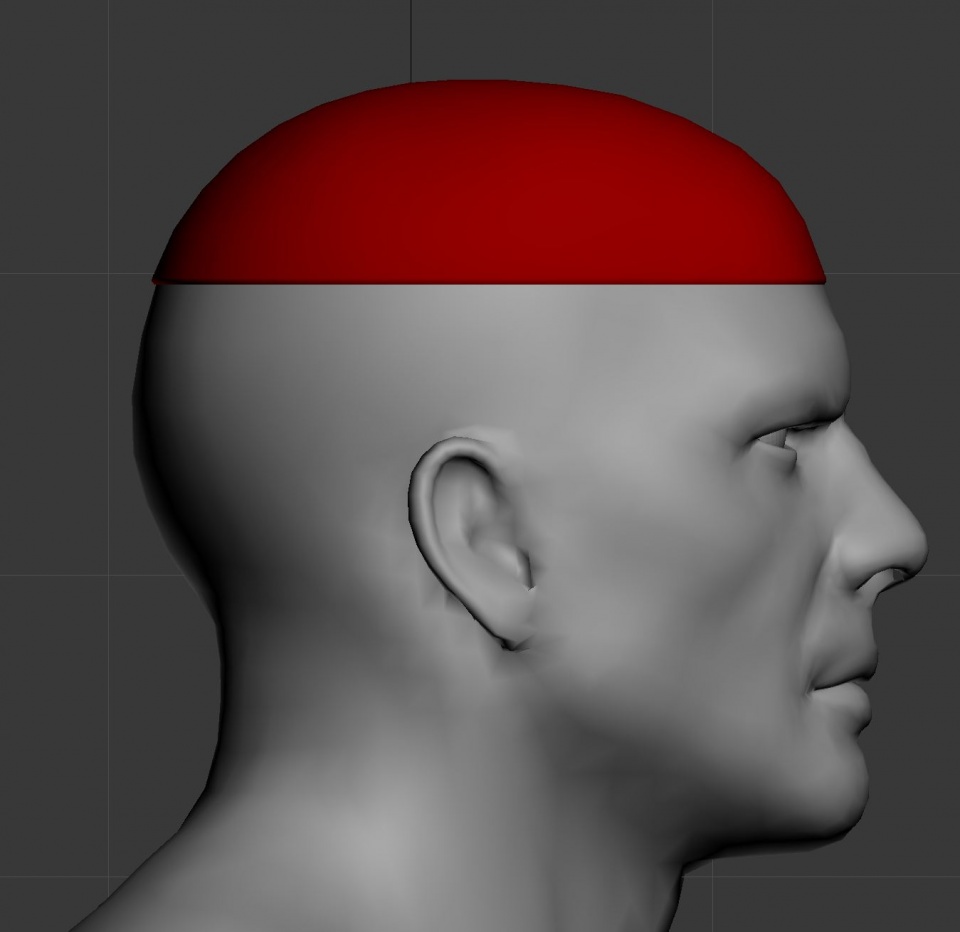
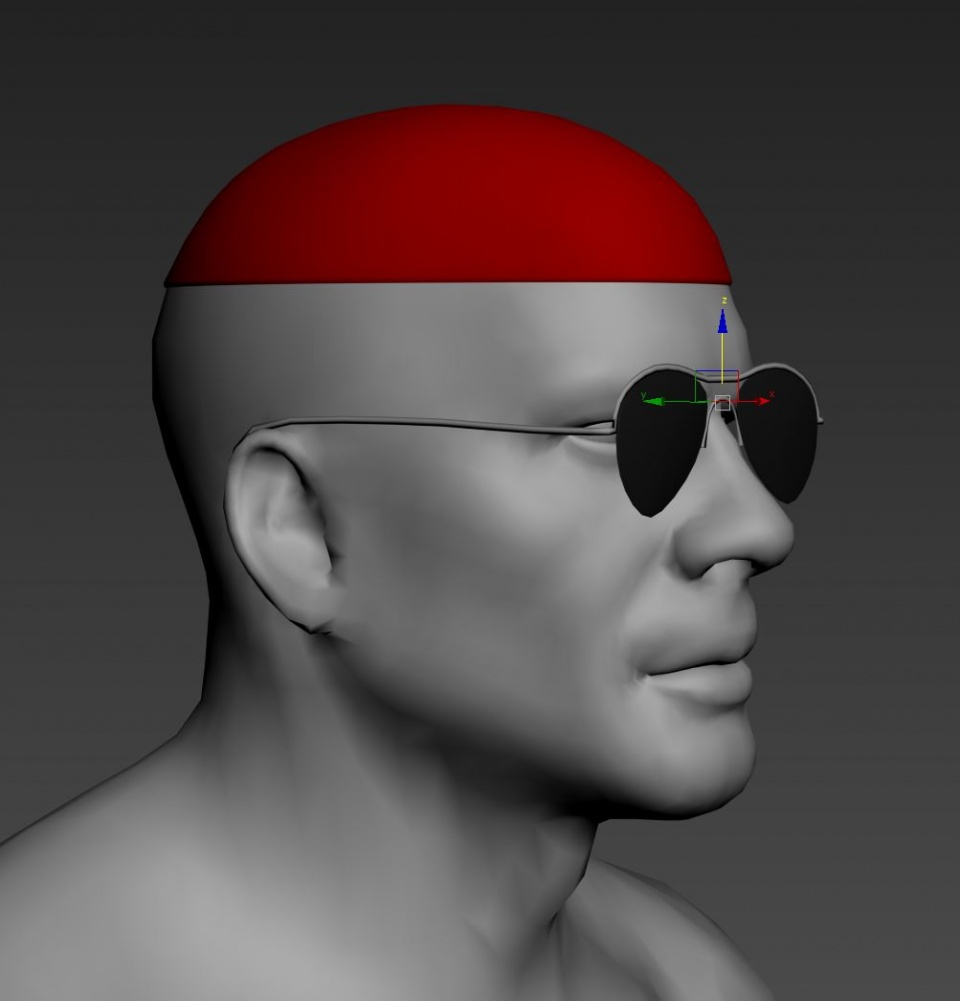
Hat meshes should be less than 3000 vertices. Note this is a maximum, not a target. Hats must rest fit on the standard head mesh covering the area shown below. There are two types of hats in UT: standard cosmetic hats and Leader hats. Standard cosmetic hats should fit the style and theme of the UT characters. Leader hats can be more expressive, and must also have a profile that is visible from a distance.
Creating Hats for Unreal Tournament
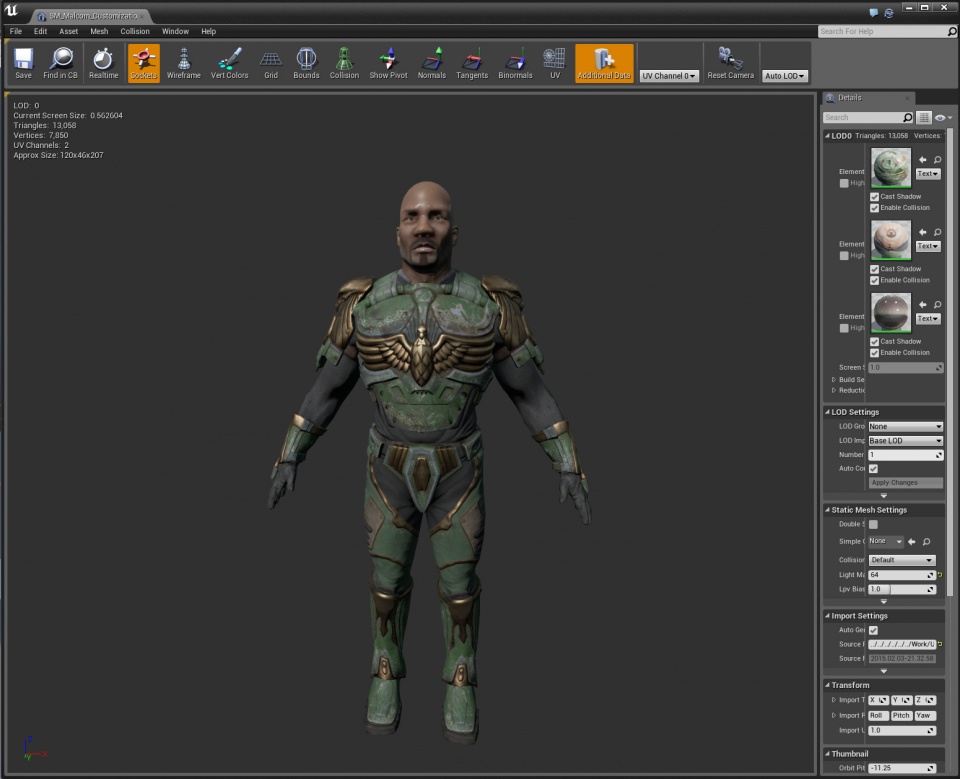
A good first step is to export StaticMesh'/Game/RestrictedAssets/Character/Malcom/Meshes/SM_Malcom_Customization_Template.SM_Malcom_Customization_Template' from the Content Browser in-engine to use as a size or fit reference.
For a minimal reference shape, export SM_HatTemplateRibbon or SM_HatTemplate_Ring. To fit all characters that conform to the standard head mesh, the hat should fit on the dome of the head as shown.
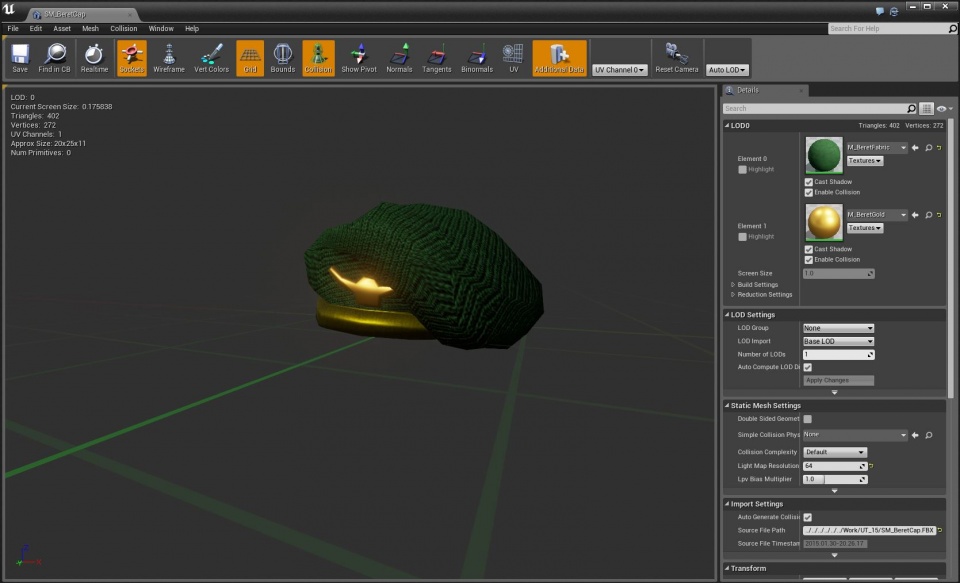
The pivot point, or origin, of a hat should be centered on the band of the hat. If you export the SM_BeretCap mesh from Unreal Engine and import it into your modeling scene, you can use it as a template for the location your new hat should occupy before export.
Once you've modeled your hat on the template's head, you'll need to center it in your modeling scene for export. Again, use the SM_BeretCap mesh as a frame of reference for this.
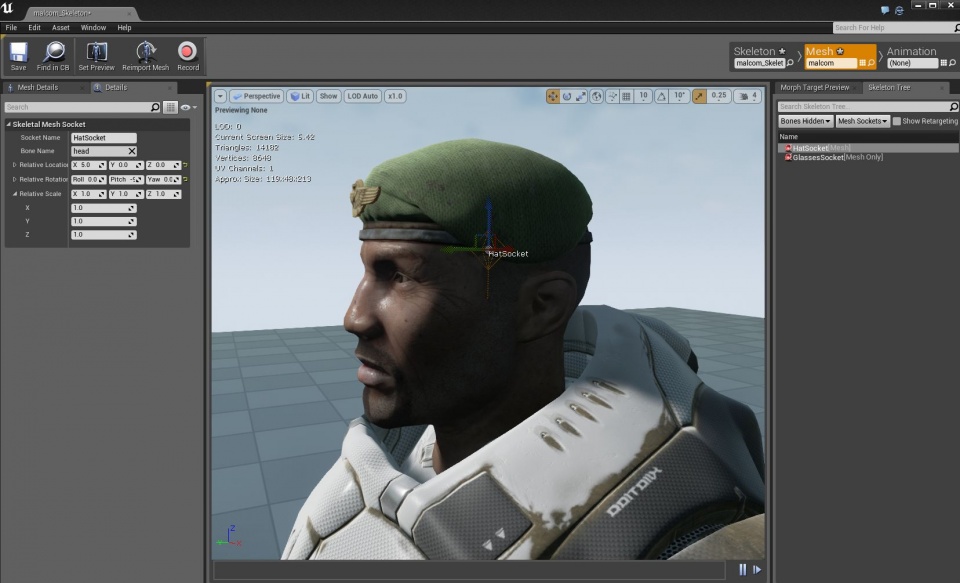
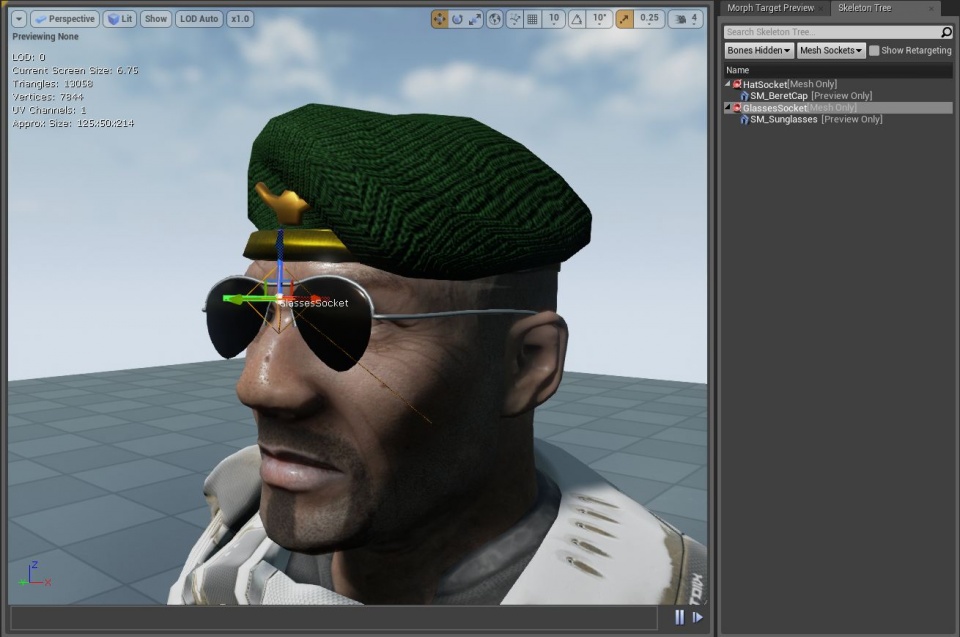
Hats attach to the character's skeleton at a Mesh Socket called HatSocket . This socket is located in the center of the character's head, slightly above the eye-line. Mesh sockets are important because they can apply different scale values from one mesh to another, allowing your hat to fit multiple character's heads automatically (as long as the mesh socket's scale is correct).
Now that your hat is imported, lets try it on! The easiest way to do this is to open a character in Persona, and in the Skeleton Tree change the filter settings to Bones Hidden and Mesh Sockets. You should see a HatSocket entry. Right-clicking on this will let you select a preview asset to view at the socket's location. If you're happy with your hat's placement, it is time to create the blueprint for it!
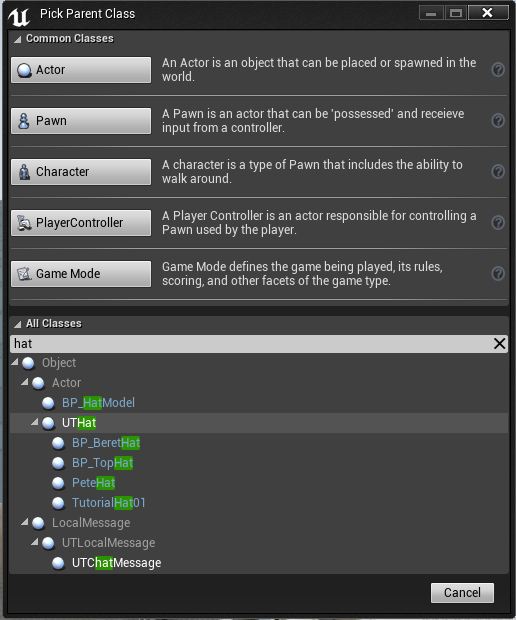
Create a new blueprint, based off of the UTHat class.
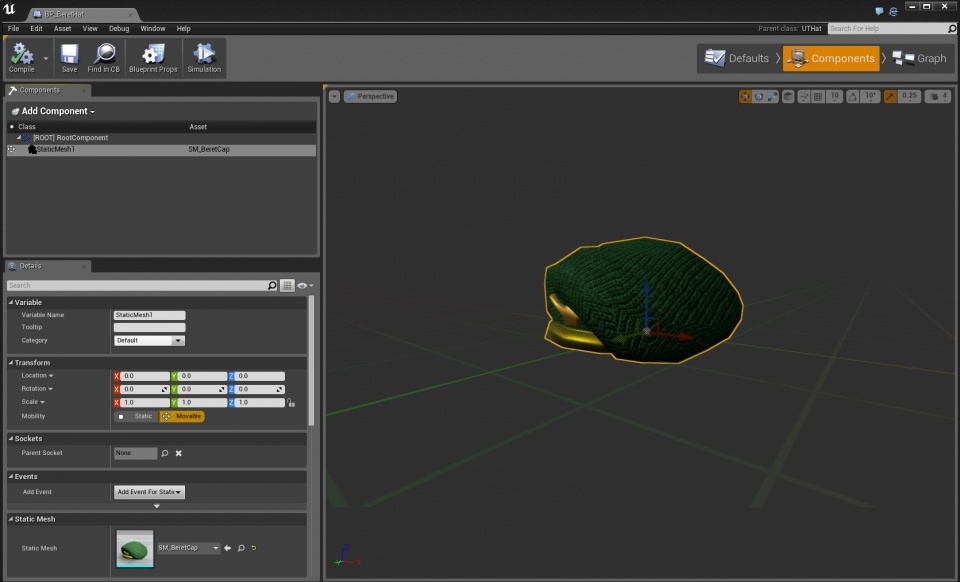
Inside your new blueprint, create a StaticMesh component in the Components tab, and use your hat mesh as the Static Mesh inside that component (Blueprint_HatComponent.jpg). Your hat is now created!
Sharing your Hat
Press the Package button in the main toolbar of the Editor. From the dropdown menu, select "Package A Cosmetic Item".
In the dialog that opens, select your hat blueprint and the packaging process will begin.
On completion, a message box will appear that gives you the option to publish your content using the launcher. You should select Yes and the upload process will begin.
Eyewear and Masks
Eyewear Creation Guidelines
Eyewear meshes should be less than 3000 vertices. Note this is a maximum, not a target.
Creating Eyewear for Unreal Tournament
Eyewear attaches to the character's skeleton at a Mesh Socket called GlassesSocket.
If you export the SM_Sunglasses mesh from Unreal Engine and import it into your modeling scene, you can use it as a template for the location your new hat should occupy before export.
The origin of the glasses should be roughly in the bridge between the lenses, which should place the glasses across the bridge of the nose on each character.
Create a new blueprint, based off of the UTEyewear class.
Inside your new blueprint, create a StaticMesh component in the Components tab, and use your hat mesh as the Static Mesh inside that component. Your eyewear is now created!
Sharing Your Eyewear
Eyewear can be shared using the same steps that used above for a hat. Make sure to choose your eyewear blueprint when the dialog appears.
