Vue Series - Terrains to UE4
Welcome to the first part in my Vue Series of tutorials.
In this guide we'll cover;
* Setting up a basic terrain generation in e-on software's Vue xStream
* Exporting landscapes from Vue as either heightmap (Heightfield) or OBJ mesh
* And finally importing it into Unreal Engine 4.
* Working with weightmaps for texturing will be covered in the next tutorial.
Let's assume you already have some working knowledge of Vue.
xStream edition is not critical, but this is the version I will be using for this tutorial.
The different Landscape Visualization editions can be found over on the E-on software website:
VUE Pioneer 2015 is now free for non-commercial use, but carries a watermark on Rendered images.
This may not include exported heightmaps or models, but Render watermarks can be removed by purchasing the RenderUp module for about $69USD Modules for VUE 2015 - RenderUp on cornucopia3d
This tutorial should apply to any Vue version from about 7 and up.
Start
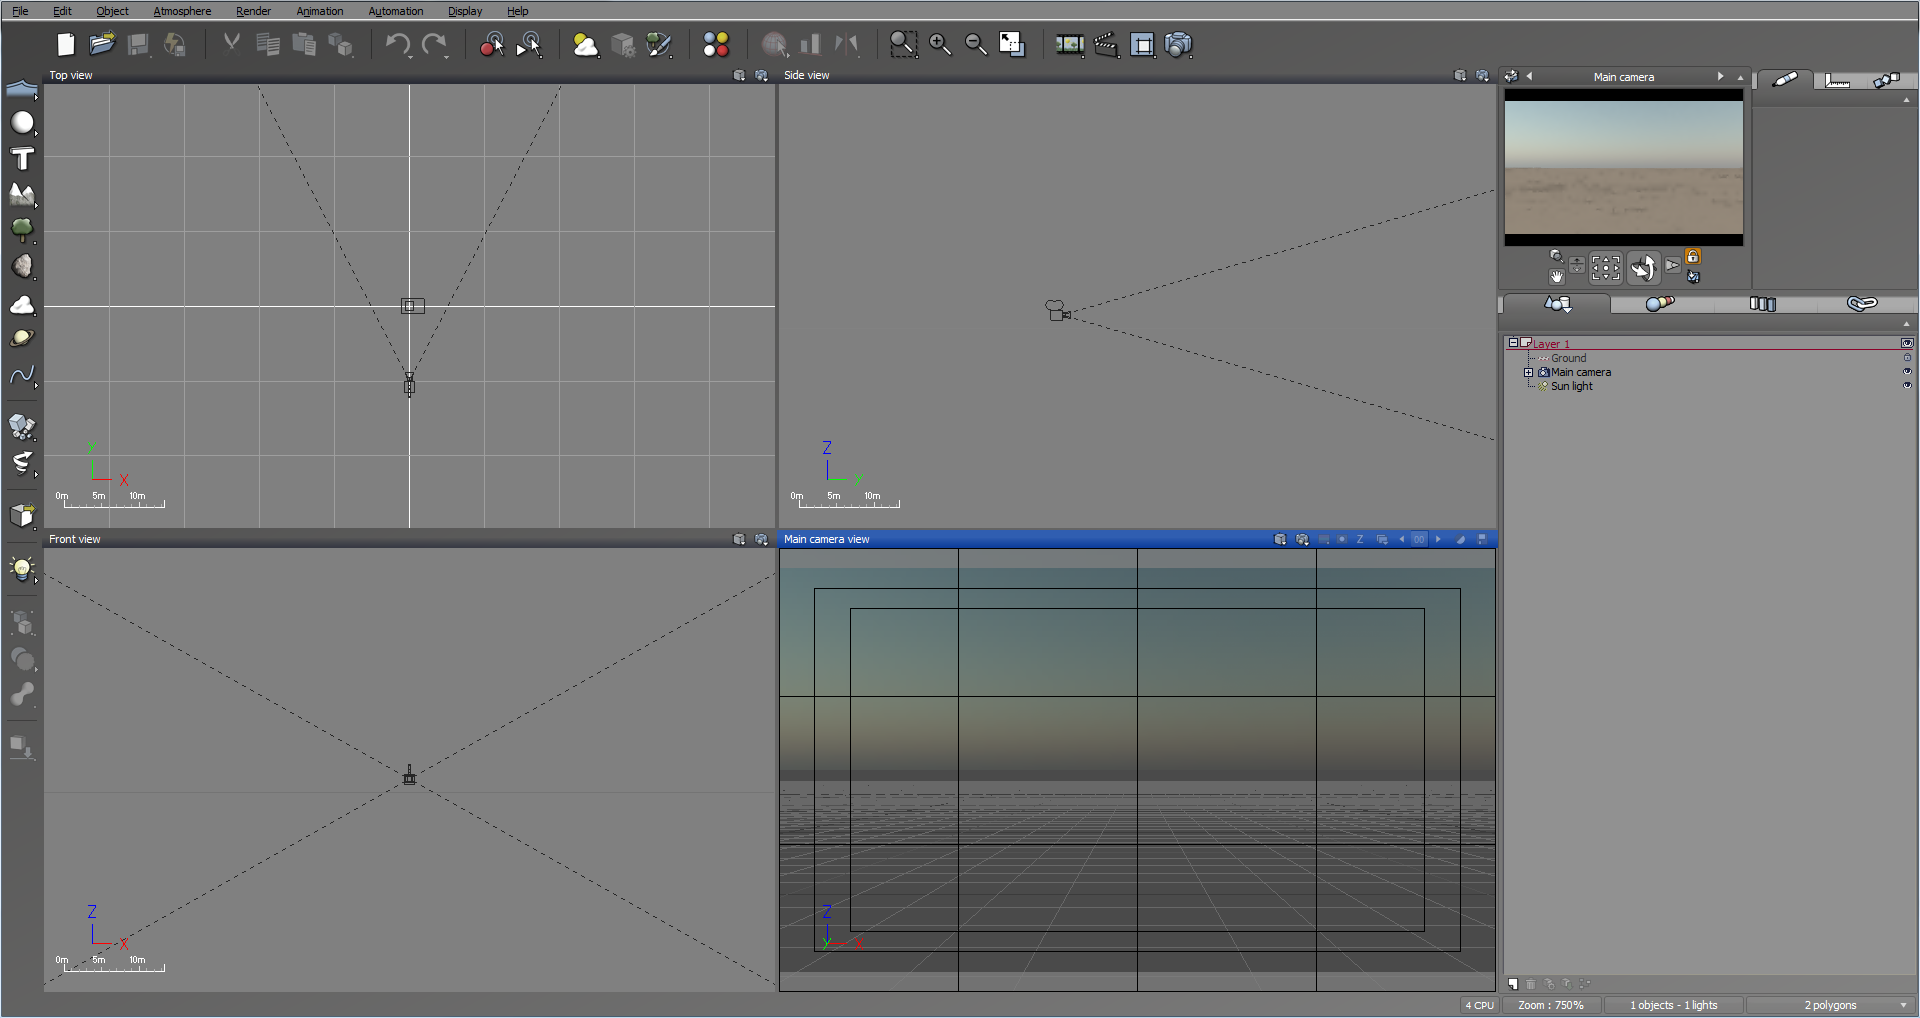
To start, open your version of Vue to a new scene.
Section A
Step A1
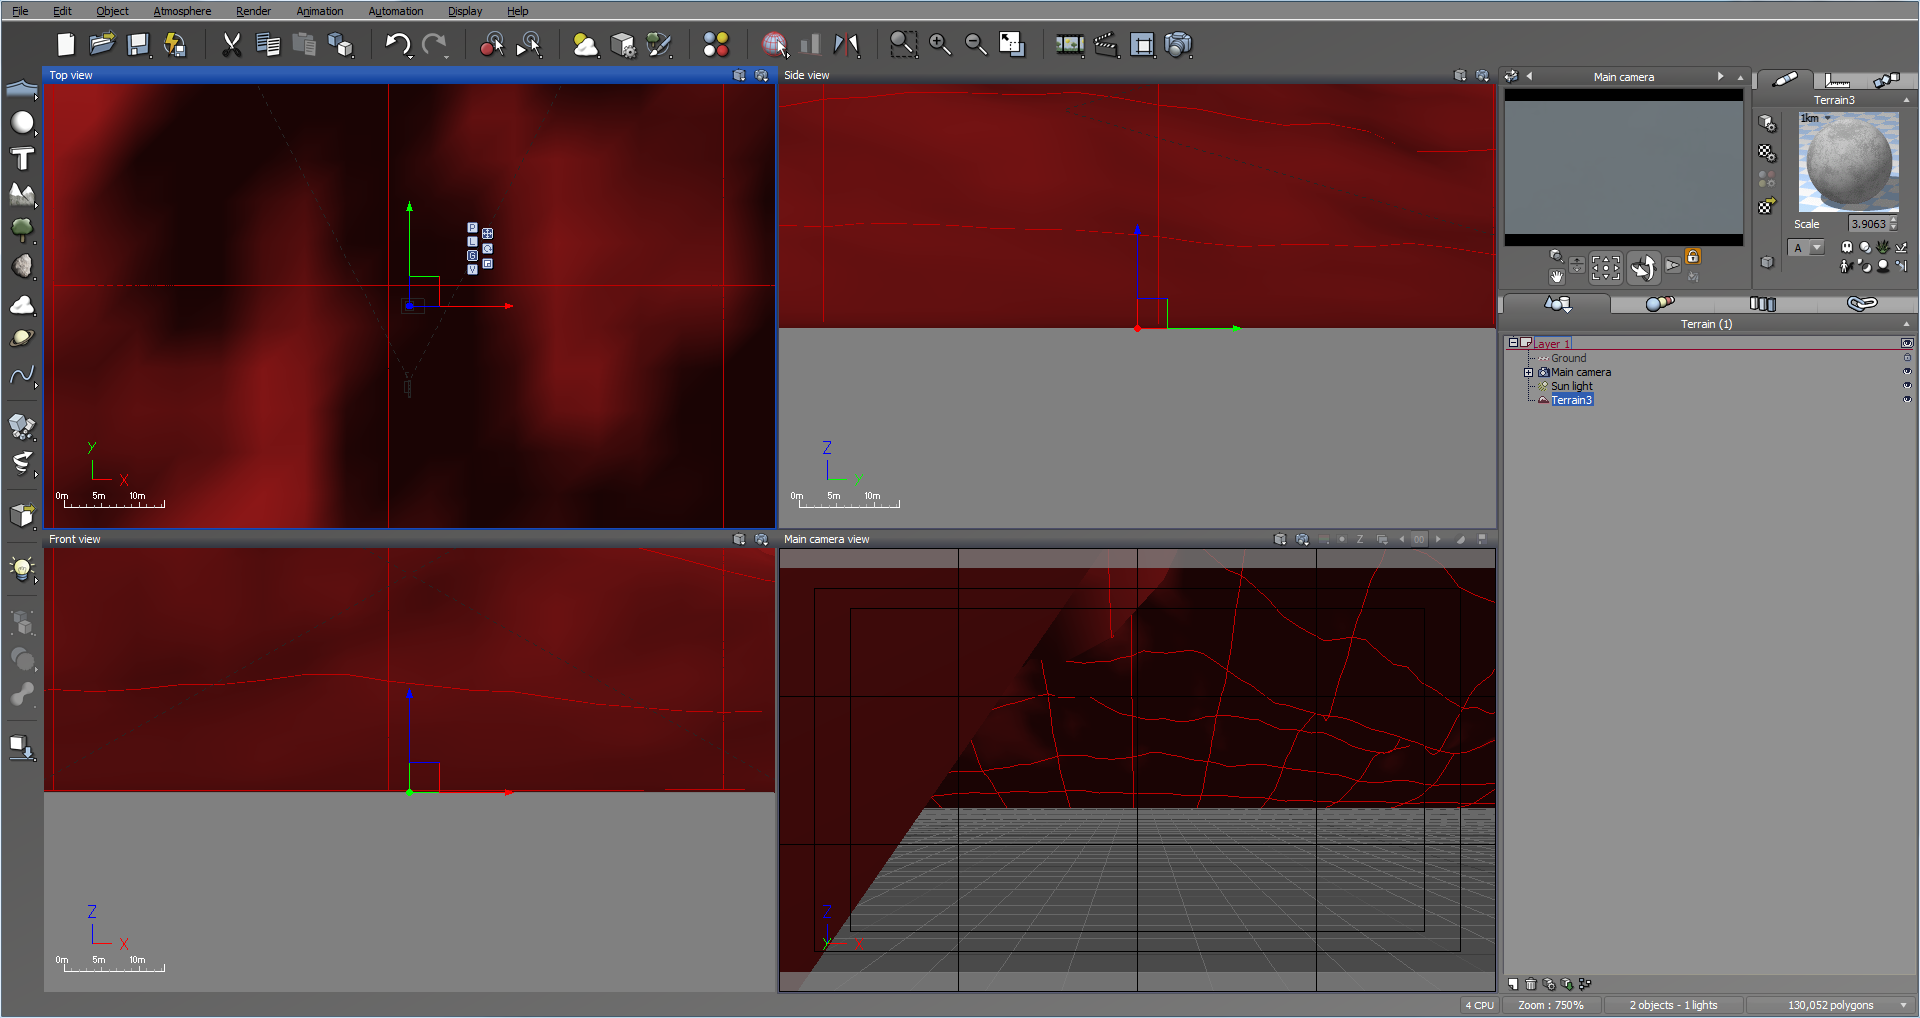
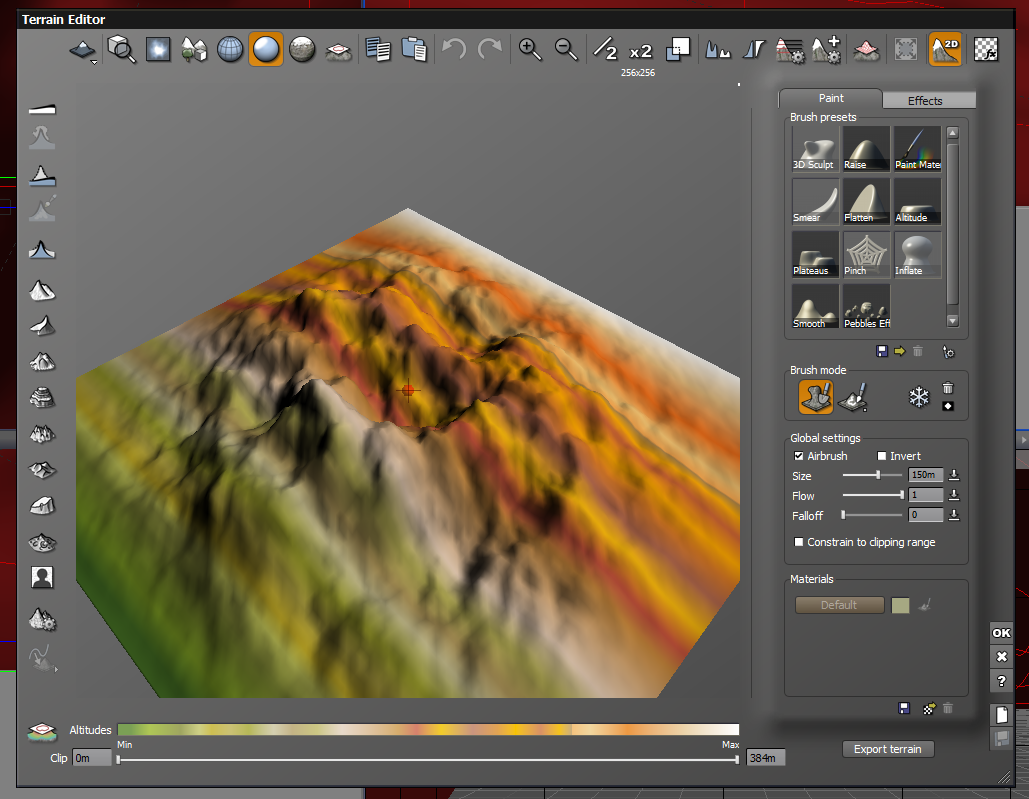
On the left hand toolbar, LEFT CLICK the terrain button. This should create a default "mountain" terrain that is auto-generated inside your Vue scene.
For the sake of time, we'll leave this auto-generated terrain as-is.
Step A2
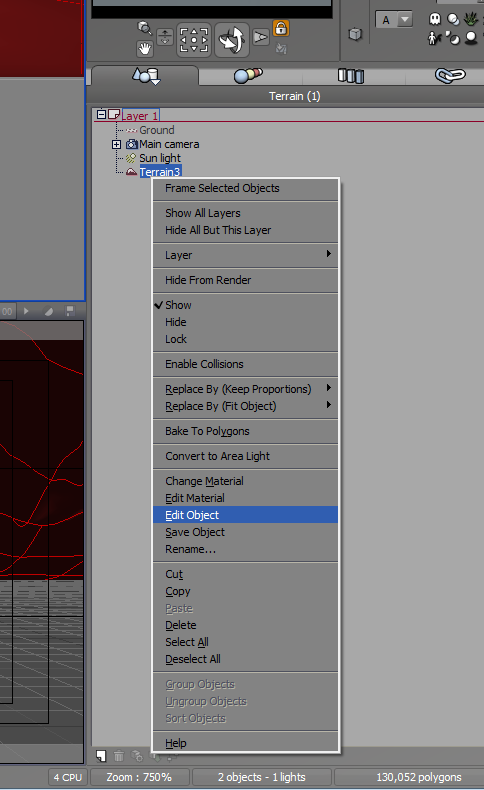
Double click this terrain in one of the Perspective views, or right click the newly created Terrain in the Layers panel, and choose "Edit Object".
Section B
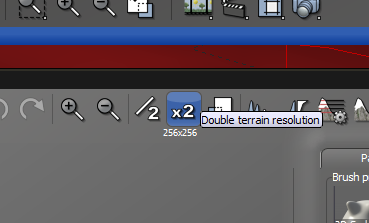
Along the top toolbar inside the Terrain Editor, look for the "2x" button to "double the terrain resolution"
IMPORTANT Note:
The size (resolution) for the terrain is important and has distinct advantages and disadvantages based on the size.

The higher the resolution, the more 'detailed' the terrain will be, at a great cost to rendering performance, editing performance and final in-game performance.

Inversely, low resolution terrains will lead to bad terracing on the exported terrain, and within the Vue editor. You should avoid going below 512x512 unless you know exactly what you are doing and why.
For more info about the Scale in UE4, read the top section of WM to UE4: In-Depth Guide
Even though this guide is fairly different because the options in Vue are vastly different to World Machine, the scale theory still applies.

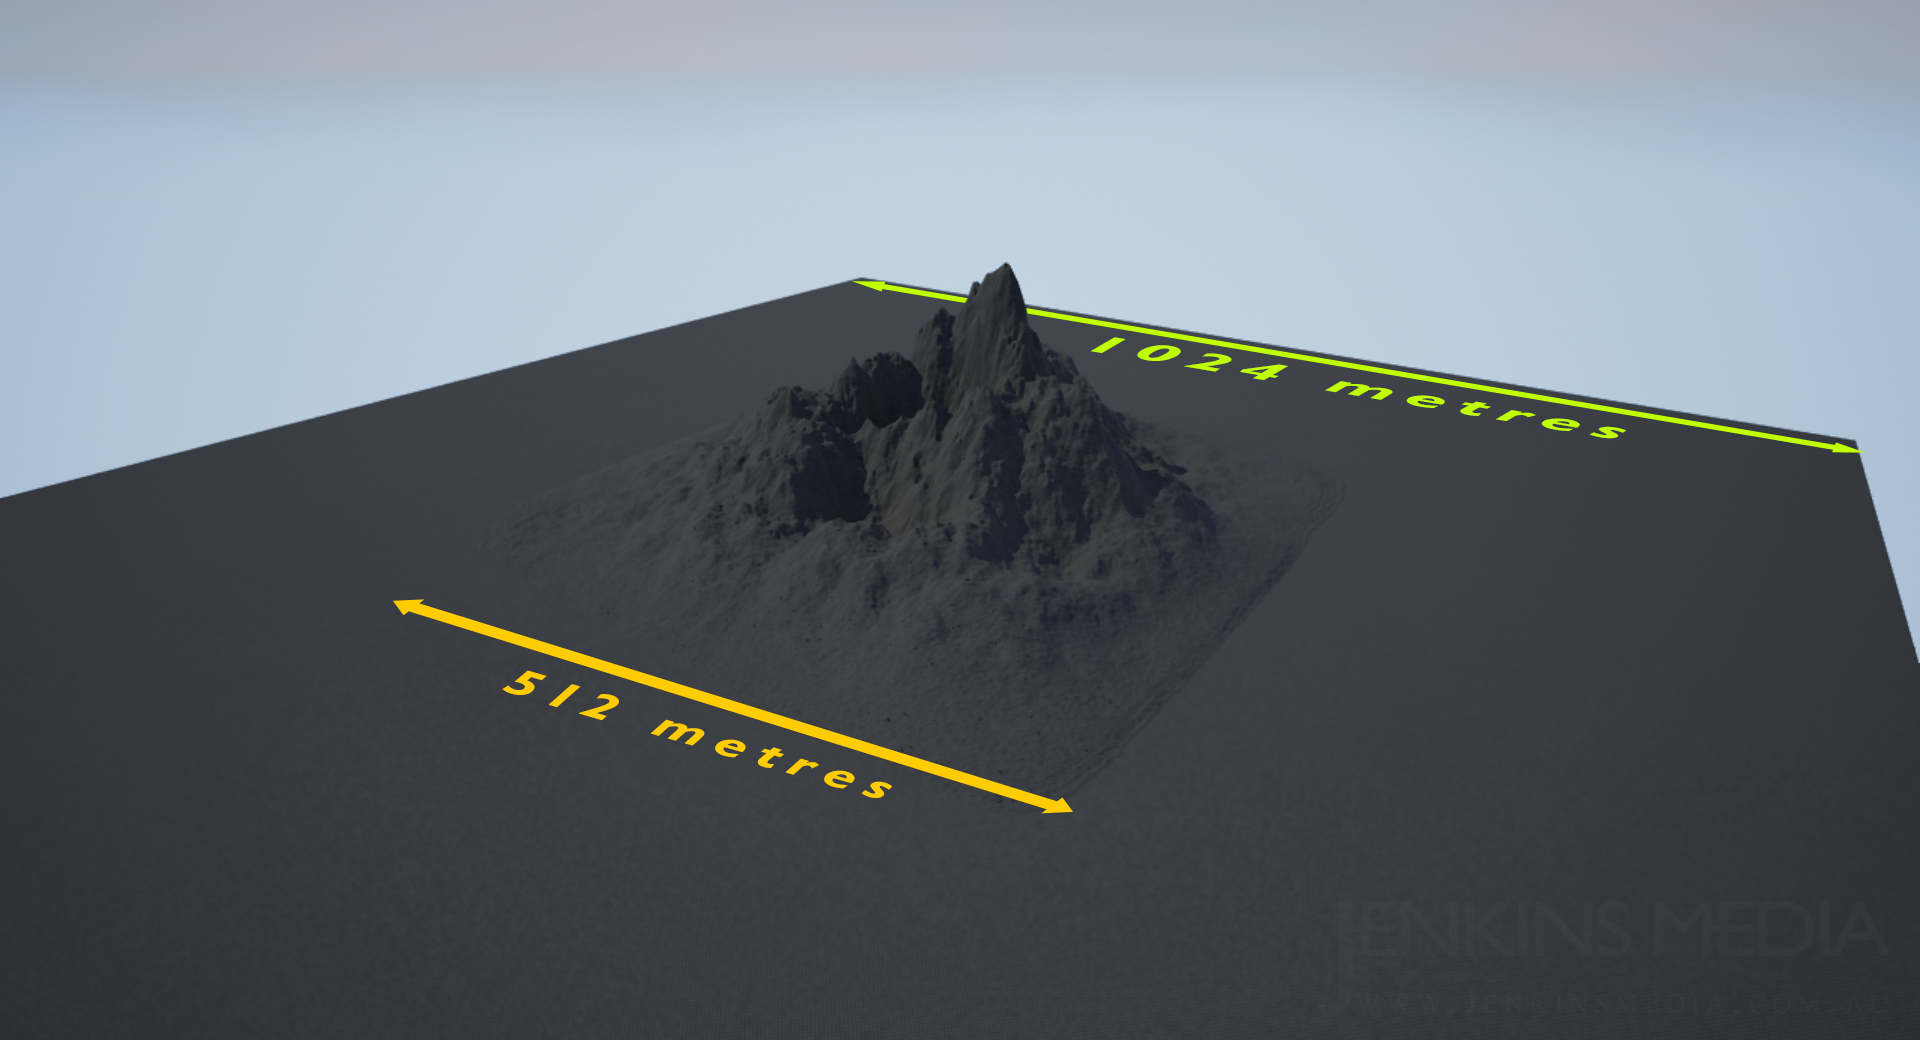
Using 1 meter = 1 Pixel ratio, the default Vue terrain of 256x256 (before pressing 2x) will be 255 meters squared in UE4.

After pressing 2x, the terrain should then be 512x512, or 511 meters squared.
Step B1
Press 2x ONCE now.
Section C
Your terrain should auto update to the higher resolution in both the Terrain editor, and in the (background) scene in Vue.
The features of the landscape terrain itself shouldn't change, but Vue will "smooth" the terrain based on the new sub-division.
Be wary of this before painting, because if you paint in the default 256x256 size, and then sub-divide, Vue will smooth out what you have just painted, and you might lose detail(s).
Sub-divide first, then paint.
Section D
Now that we have a terrain we're happy with, we have 2 choices;
Exporting as a heightmap (Heightfield)
Just a quick factoid, the official term for a Terrain Heightmap is technically "Heightfield".
This term is used to denote the difference between a (always black & white) Texture Heightmap and a map that defines the topography of a terrain (not always black and white).
Step D1
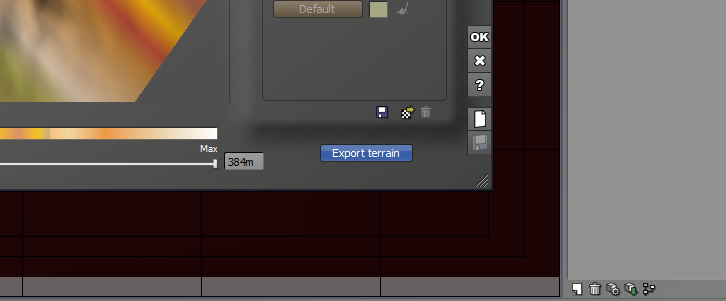
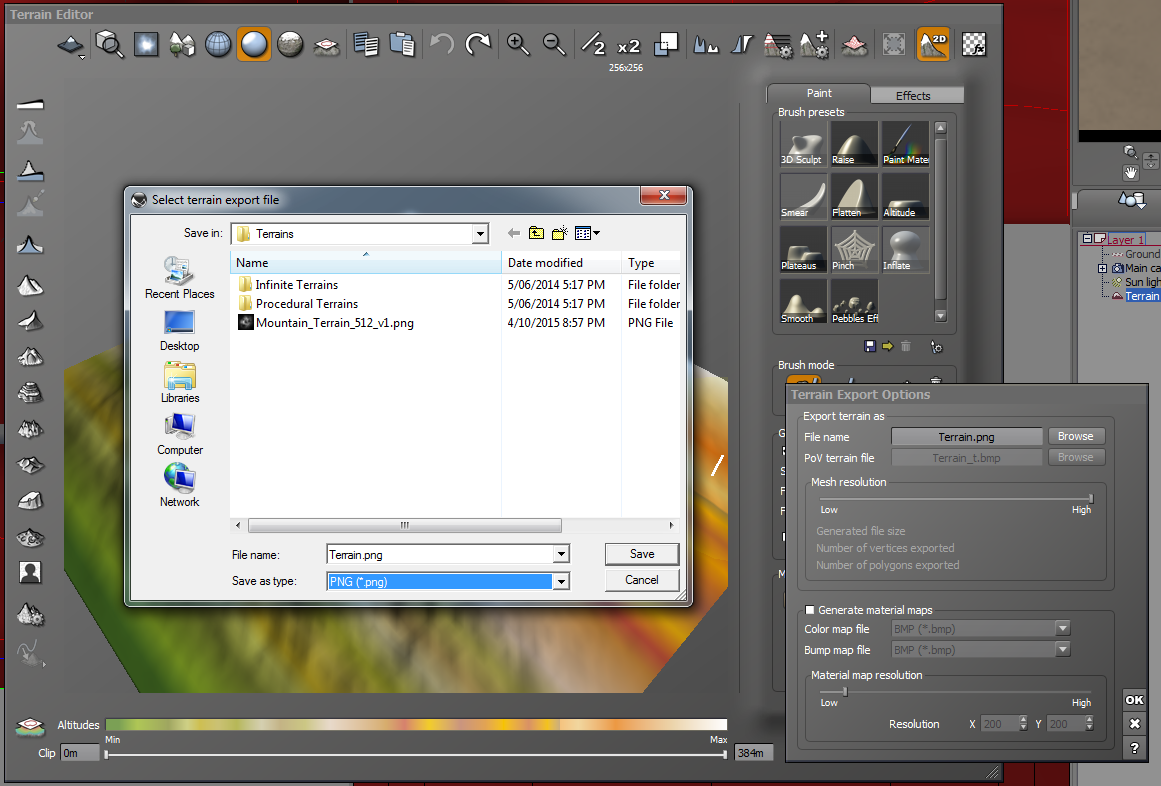
Press the "Export Terrain" button at the bottom right of the Terrain Editor
- There are several options here, but we're going to ignore most of them for now.
Step D2
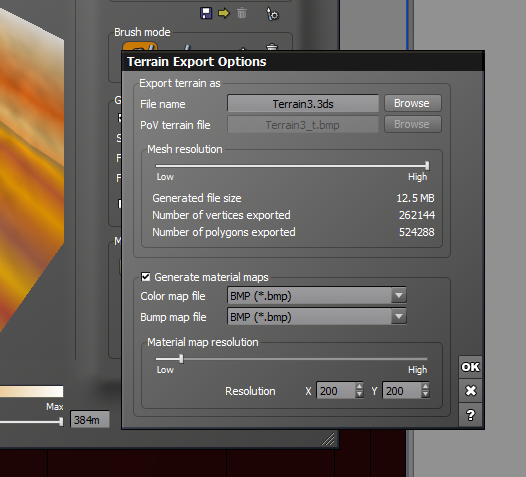
Next to the default name of "Terrain.3ds" press Browse
Step D3
Select PNG (*.png) from the "Save as Type" drop down list.
Step D4
Give your Terrain a descriptive name, don't just call it "Terrain". You should also probably put the resolution you used in the actual name. Something like, Mountain_Terrain_512_v1.png
- For this tutorial we'll save the file to the Vue/Terrains folder, but you can save this anywhere you like.
Step D5
Press Save
- Vue hasn't actually exported anything yet, we're just "saving" a location to be exported to.
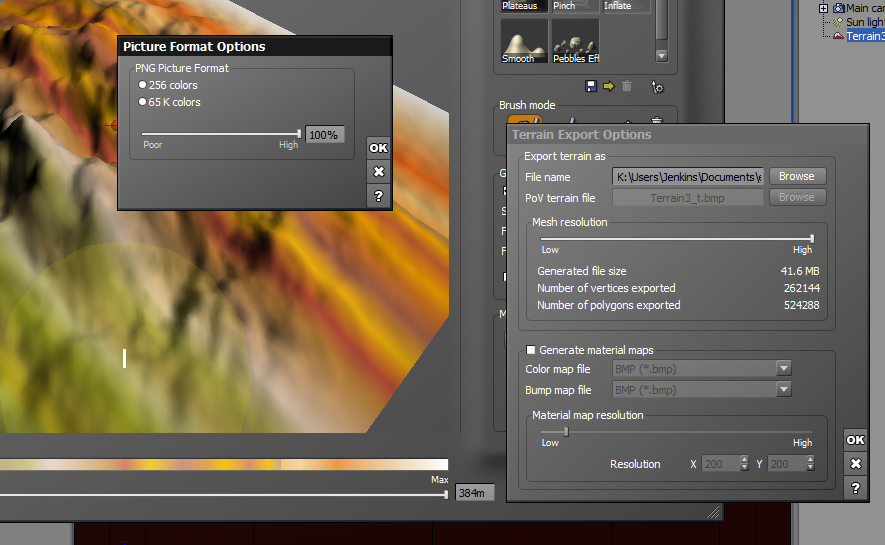
After pressing Save, you're presented with a couple of PNG output options;
CRITICAL: Move the slider all the way up to "100%" (High).
Step D6
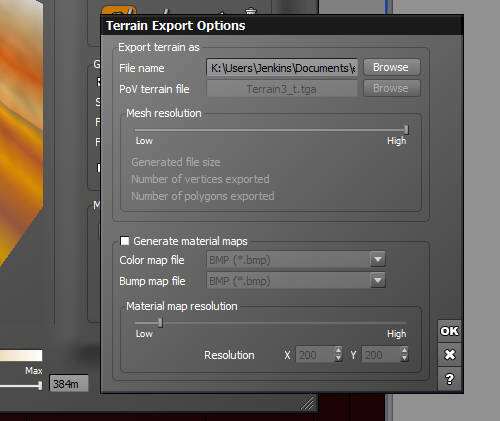
Make sure you have UNCHECKED "Generate Material maps"
- We'll be covering this in the next tutorial: Vue Series - Weightmaps to UE4
- Also note that "Mesh resolution" only applies to certain meshes, it has no effect on Heightfields.
Step D7
Press OK on the Terrain Export Options window.
Step D8
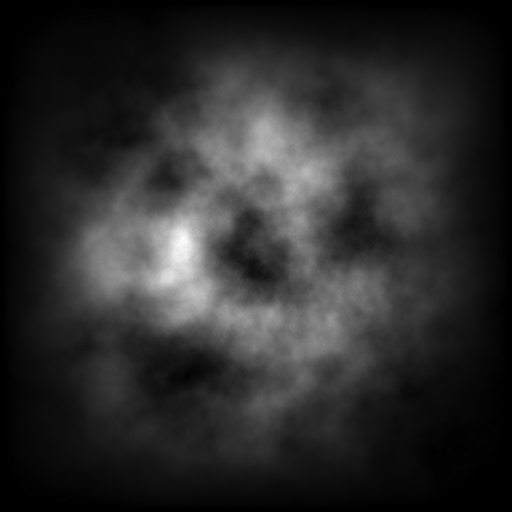
Unfortuantely, Vue cannot export greyscale PNG's, which is a problem for importing into UE4 and will have undsired results.
You will need to convert the Indexed RBG .png into a Greyscale PNG before importing into UE4.
This can be done in any decent image editing program like Photoshop, Gimp, Corel etc.
Another unfortunate fact is you cannot convert to greyscale in Paint.NET or MS Paint.
Convert to greyscale in Gimp
1. Duplicate the original image (Ctrl+D)
2. Right-click on the copy. Select Image -> Mode -> Grayscale.
3. Then we need to convert the PNG to 16bit depth. Again, select Image -> Mode -> Indexed.
It is important to note that "Greyscale" is not the same as "Desaturate".
If you use Desaturate, the image will most likely still be saved as RGB, and also there may be more noise in a desaturated RGB image, compared to a Greyscale image.
More info on this over at: gimp.org
4. Save the image from Gimp and continue to Section E.
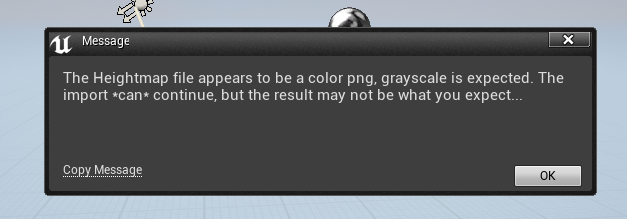
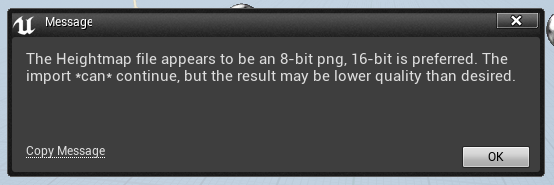
NOTE: If you don't save as 16bit, when you import into UE4, you'll get a message like this;
Epic aren't messing around here! Not only is the terrain lower quality, but has unexpected and undesired results.
If you receive this message, press OK, then immediately delete the terrain, go back to Photoshop or Gimp, and make sure you change & save the PNG as 16-bit.
Convert to greyscale in Photoshop
Photoshop doesn't require you to duplicate the image to convert to greyscale.
Other than that, the process is quite similar to Gimp.
1. Open your exported PNG in Photoshop
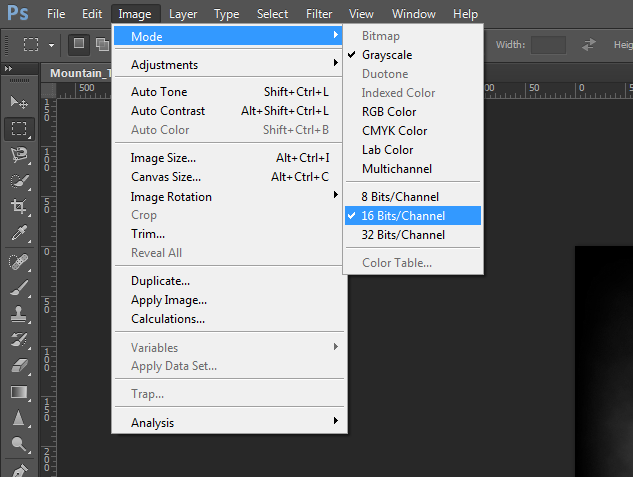
2. Go to the Image menu -> Mode -> Greyscale
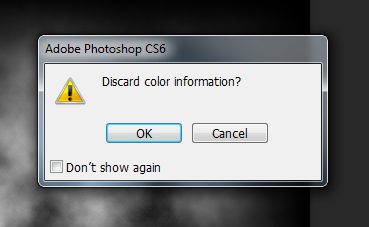
- Photoshop may ask you: "Discard color information?", this is not important as our source image is already black and white (just saved in a RGB format)
3. Press "OK" to 'discard color information
4. Go back to the Image menu -> Mode -> and choose 16 Bits/Channel.
You should now see in the title bar "Myimage.png @ 100% (Gray/16)*
5. Save this image as either a new copy, or overwrite the original exported file.
You should now have successfully exported your heightfield to a PNG image ready for importing into UE4.
Continue to Section E to begin importing your PNG heightfield into UE4.
TGA Note: If you incorrectly chose Targa (*.tga) as the export format, you will get a message saying something like;
Vue can export Targa pictures that are altitude maps coded with a 16 bit resolution for improved details (Red is high order byte, green is the lower order byte). Should this file be saved as a 16 bit altitude map?
The "altitude maps" that are mentioned in the previous message are exactly why there is a both a name and end-result difference between a "HeightMAP" and a "HeightFIELD", but UE4 makes no such distinction. That's doesn't mean you shouldn't though!
Exporting as an OBJ mesh
IMPORTANT NOTE:
This method is a more advanced option, and should only be considered for exportation of Terrains that you want to be a mesh object in UE4 instead of the built in "Terrain" feature of UE4. (This will most likely give you less control in UE4 and could severely hurt cooking performance!).
Exporting in multiple mesh formats is supported, but we're going to use OBJ here for ease of importing into UE4.
Other formats like .3ds or .c4d are useful if you are going to further edit the mesh in 3DS MAX or Cinema4D.
Step D1b (OBJ)
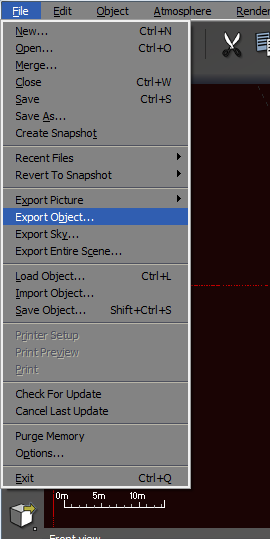
Instead of exporting from the Terrain Editor, we're going to Export Object (the terrain) from the File menu.
This is necessary to add/preserve smoothing groups in the mesh. (Not working though?)
TODO: Why is smoothing not working?
Step D2b (OBJ)
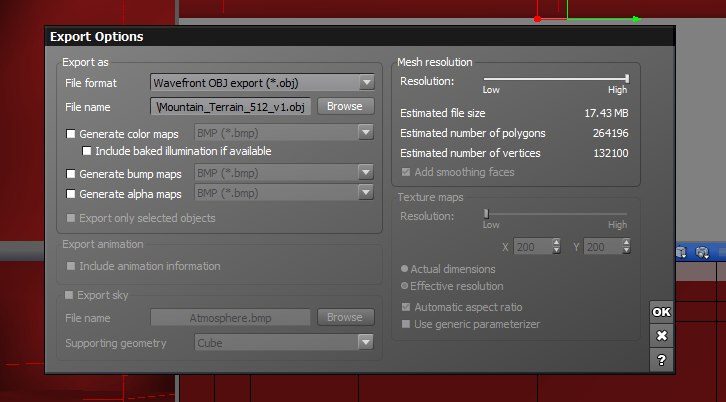
Select Wavefront OBJ export (*.obj) from the "File Format" drop down list.
Step D3b (OBJ)
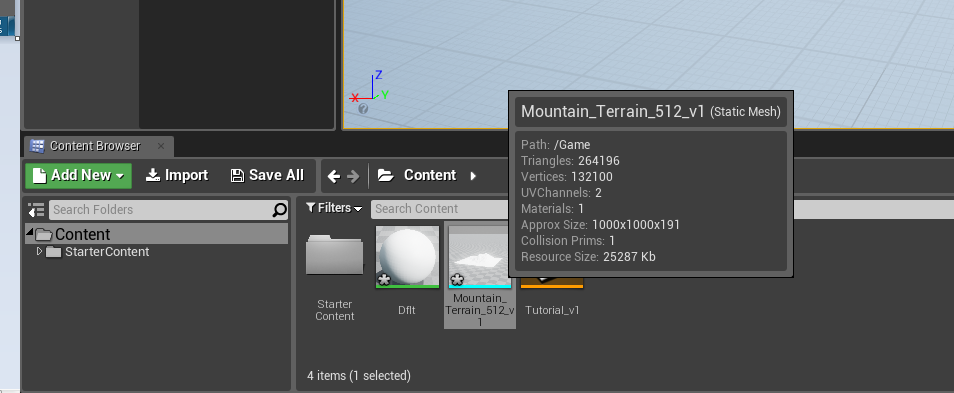
If you have Vue Infinite or xStream, you can crank up the resolution, but be warned, even a small to medium sized terrain (our 512x512 example) at 100% resolution will create an OBJ 17mb in size, and have approximately 264,000 polys / 132,000 vertices.
For small terrains like our example, we'll use 100% to max out the resolution of the terrain due to it's reasonably small size.
For larger terrains however, there is a trick with the slider in the Mesh Resolution section;
If you slide it all the way up to 100%, then very gently slide back 1 pixel/unit of the slider, you will notice a significant jump between the size/polys/verts of 100% and 99%. Something in the range of 50% less or greater.
As it currently stands, I can't fully explain this, and through researching I haven't been able to get a straight forward answer.
My best guess is that it's an exponential component, so each % = a subdivision of the resolution to some decimal place.
REMINDER: This is an advanced option. Make sure you read the IMPORTANT NOTE under Exporting as an OBJ mesh.
Cooking a 100% resolution, 264k poly terrain, even at 512x512, and even at "Medium" lighting with no other meshes in the scene could severely damage cooking times. Especially without a "Lightmap Importance Volume".
YOU HAVE BEEN WARNED! :)
Step D4b (OBJ)
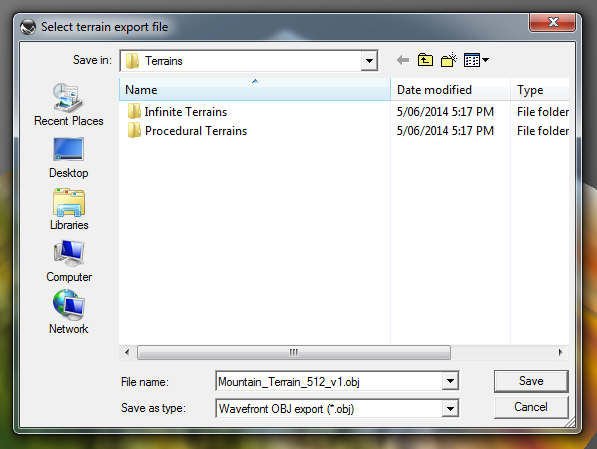
Press Browse and choose a target location and name for your OBJ terrain.
Give your Terrain a descriptive name, don't just call it "Terrain". You should also probably put the resolution you used in the actual name. Something like, Mountain_Terrain_512_v1.obj
- We'll save the file to the Vue/Terrains folder, but you can save this anywhere you like.
Make sure you have UNCHECKED Generate color maps, Generate bump maps and Generate alpha maps, as we won't be needing them at this point.
UE4 also makes it possible to skip this step completely, even if the terrain will be textured. (We'll cover this in a later tutorial) :)
Step D5b (OBJ)
Press OK to export your terrain.
You should now have successfully exported your terrain to an OBJ mesh ready for importing!
Skip ahead to Section F to begin importing your OBJ Terrain into UE4.
Section E (Heightfield based terrain)
Step E1
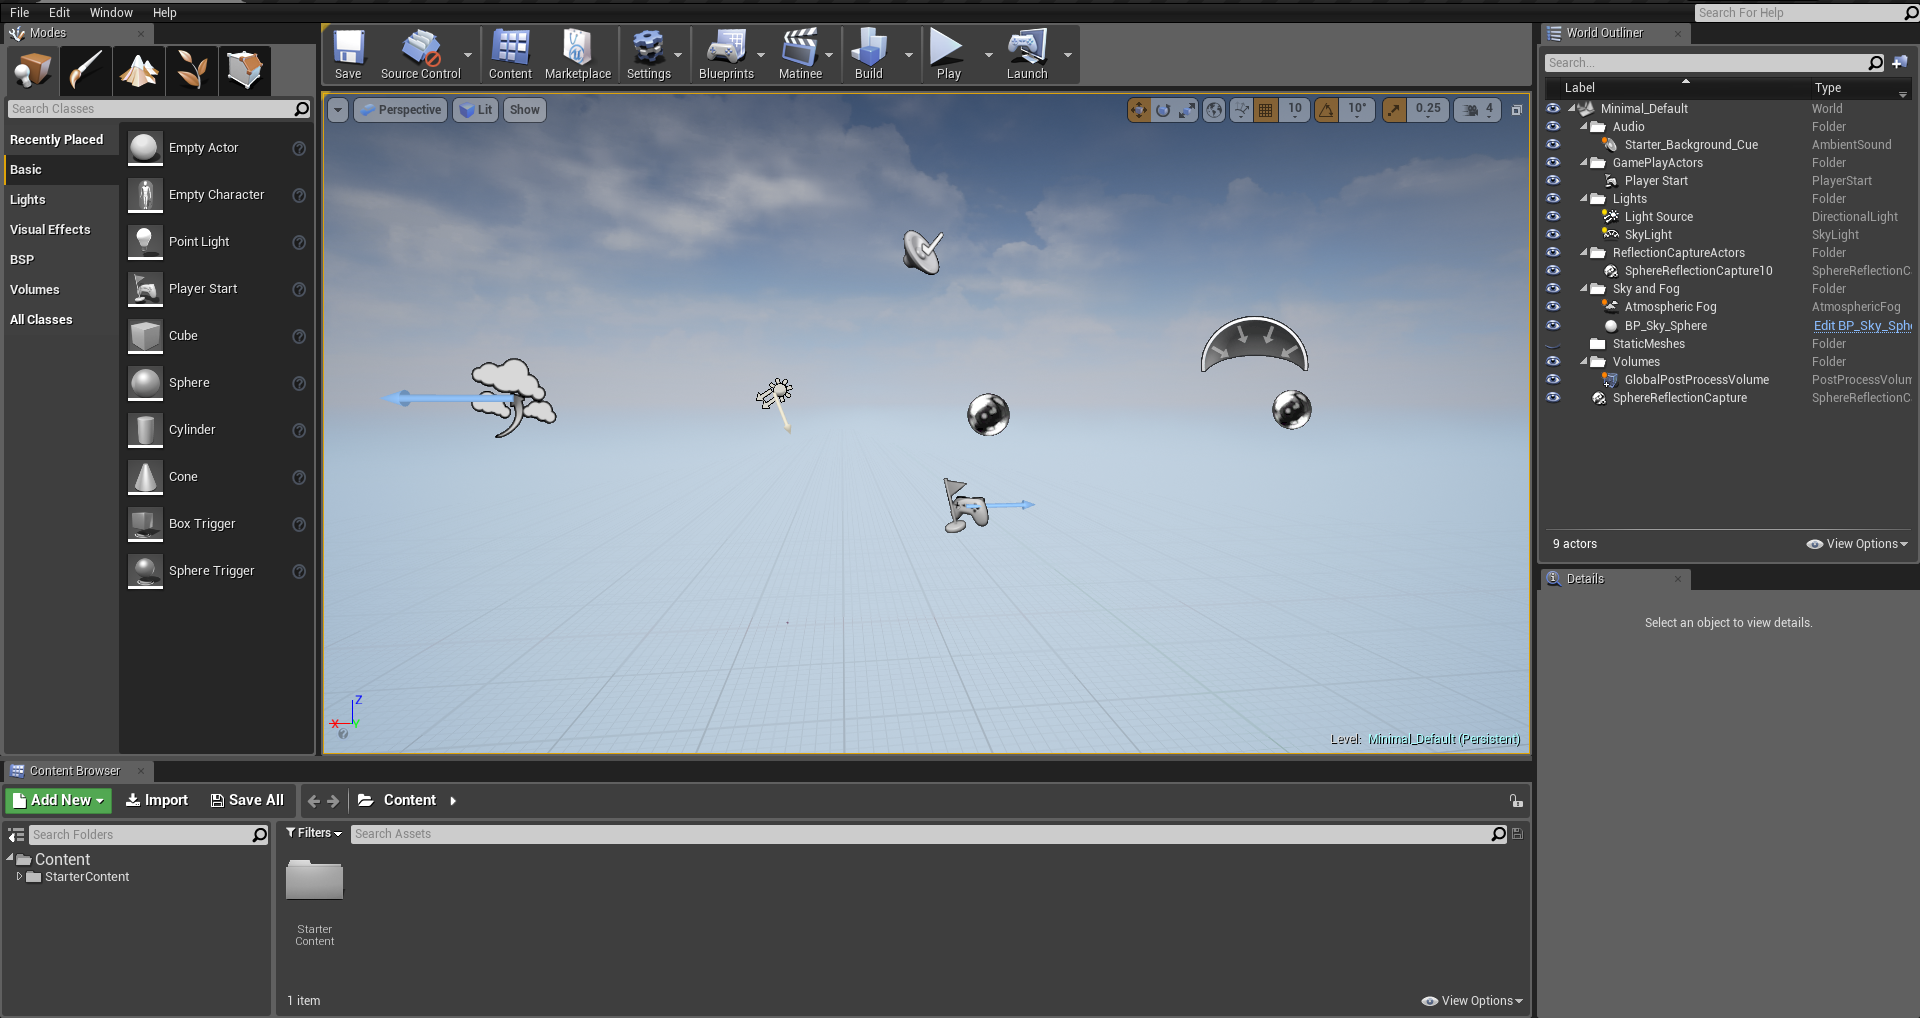
Open up your UE4 editor to a map of your choosing.
For this tutorial, I've made a new UE4 project, and included the Sample Content inside of it, and removed all of the static meshes that are default to this setup (the chairs and table, glass statue etc)
Step E2
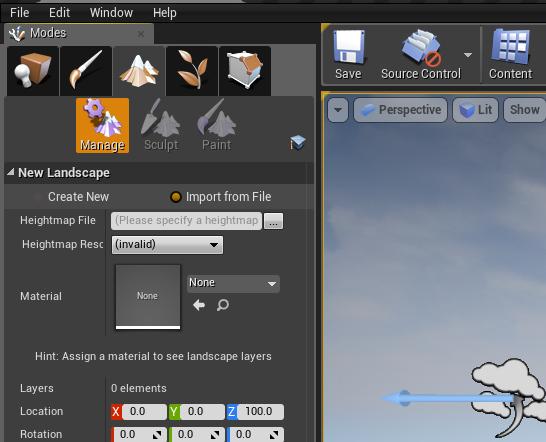
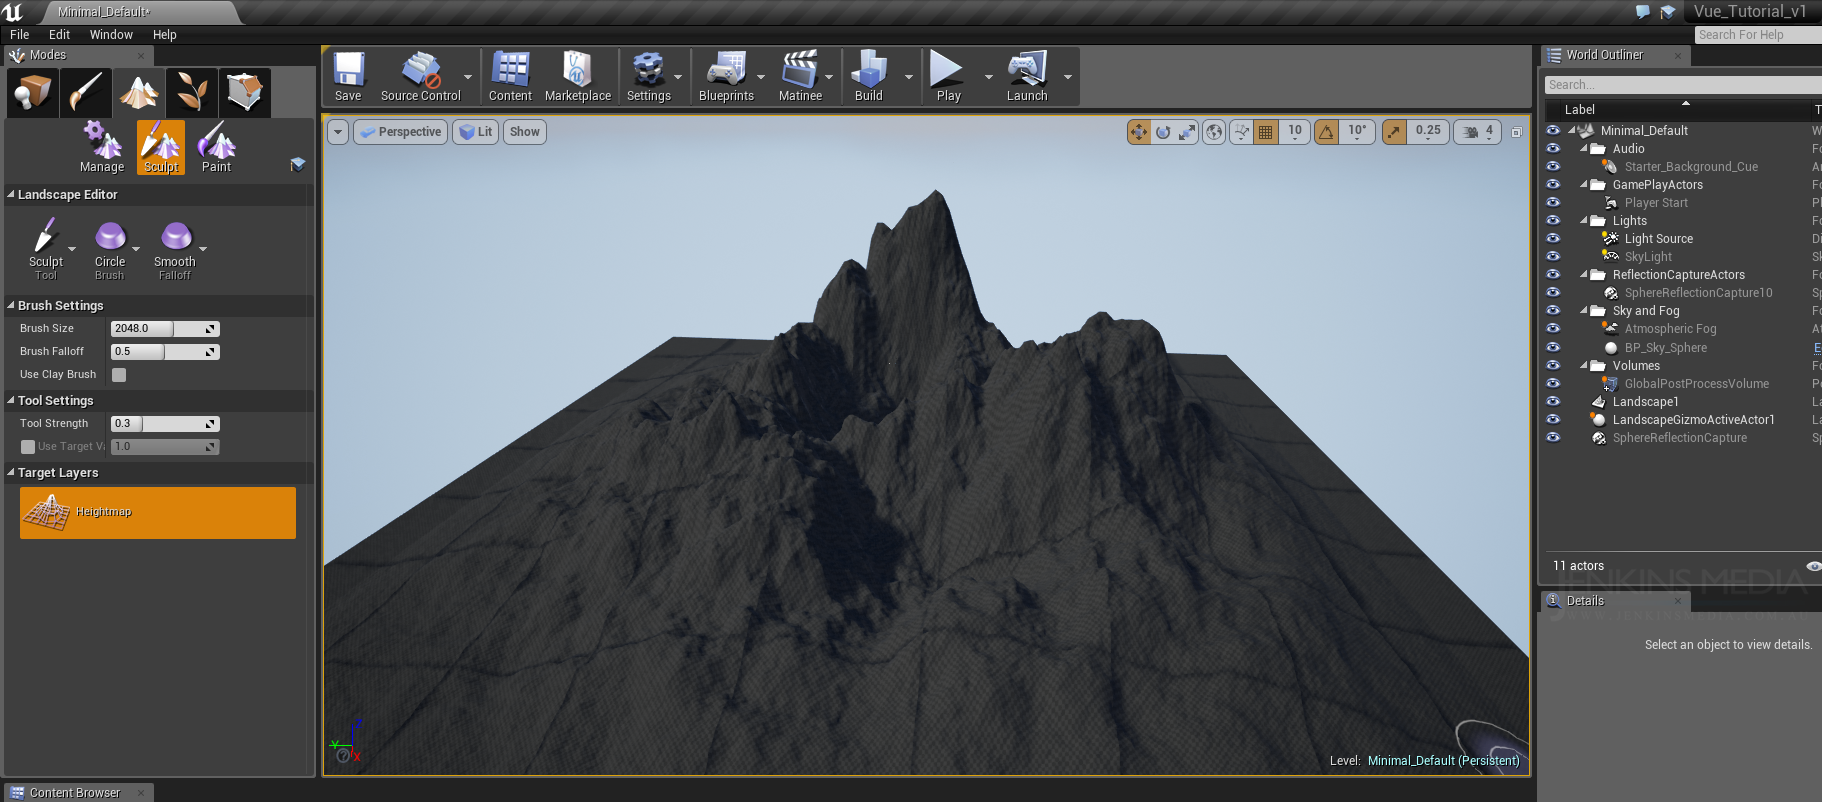
Select the "Landscape" tab or alternatively press Shift + 3
Step E3
Under the heading "New landscape" press "Import from File".
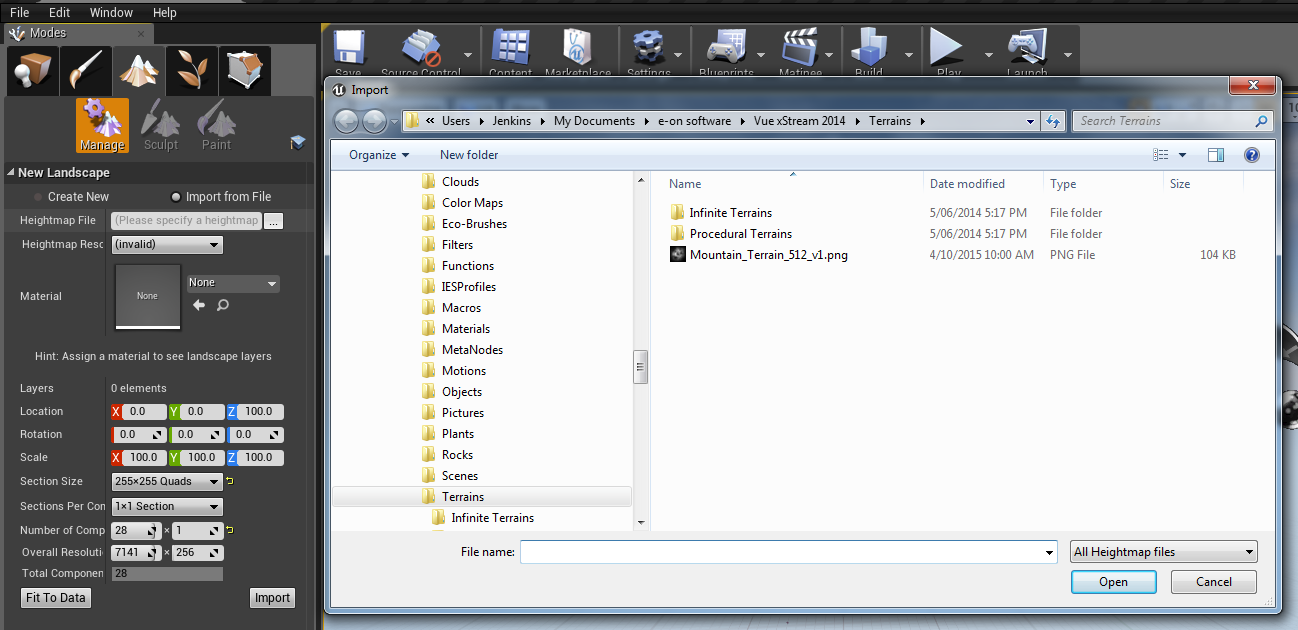
Step E4
Click the ellipsis (...) and browse to the PNG Heightfield you exported from Section D.
Step E5
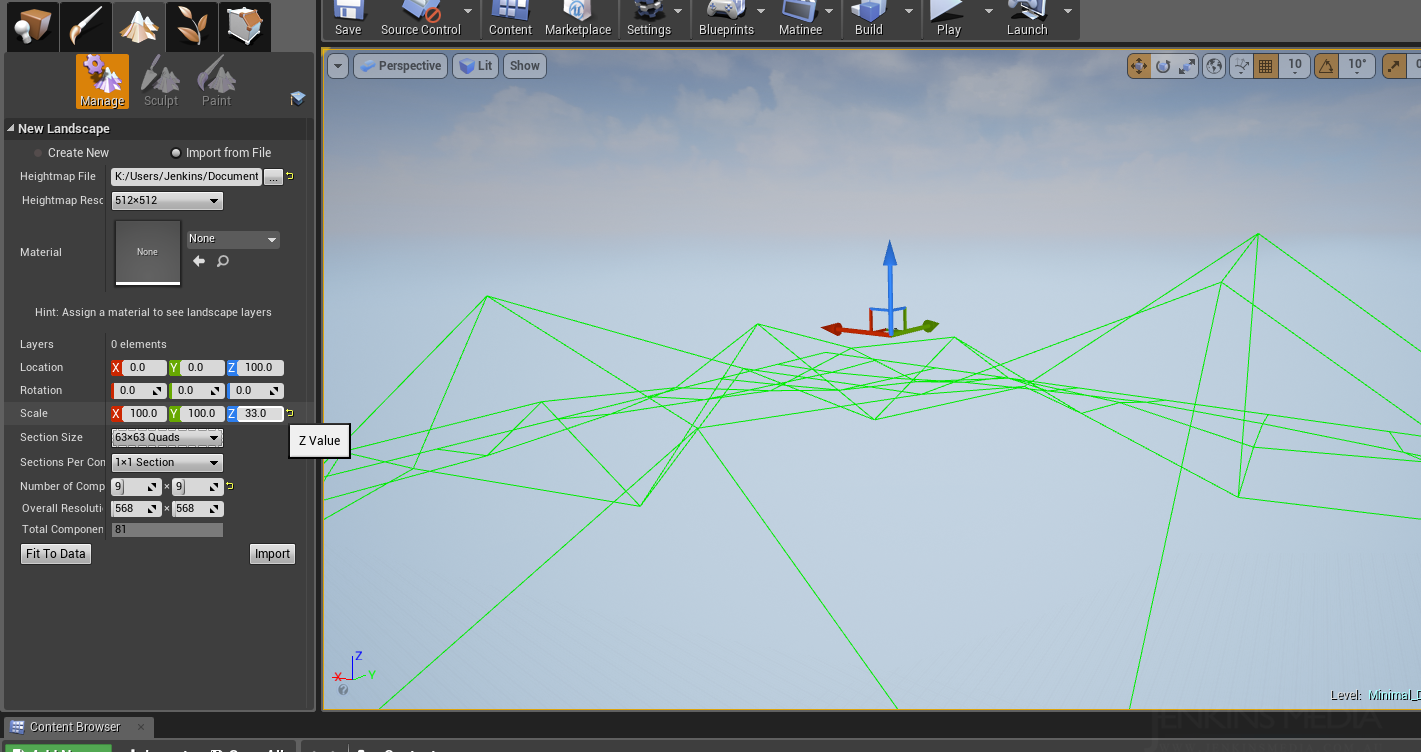
On the left hand panel, you should see some ![]() options for both Location and Scale.
options for both Location and Scale.
We'll leave the "Location" fields alone.
Next to the Z in Scale, we'll need to do some trial and error to get this just right.
For this example tutorial, I first imported the terrain at Z:100 and this was too excessive.
I halved it, and tried Z:50, and was still too high.
Z:33 seemed to work ok for this example. It's not perfect but it should give you an idea.
Ideally, importing from Vue would most likely be around the Z:16-25 mark, but every terrain is different, and there's no harm in trying.
If you don't like it, delete the whole terrain, and go straight back to Step E3.
Step E6
Now press Import at the bottom of the Landscape panel and your new terrain should import.
Section F (OBJ based terrain)
Continuing from Step D5b.
Step F1
Open up your UE4 editor to a map of your choosing.
For this tutorial, I've made a new UE4 project, and included the Sample Content inside of it, and removed all of the static meshes that are default to this setup (the chairs and table, glass statue etc)
Step F2
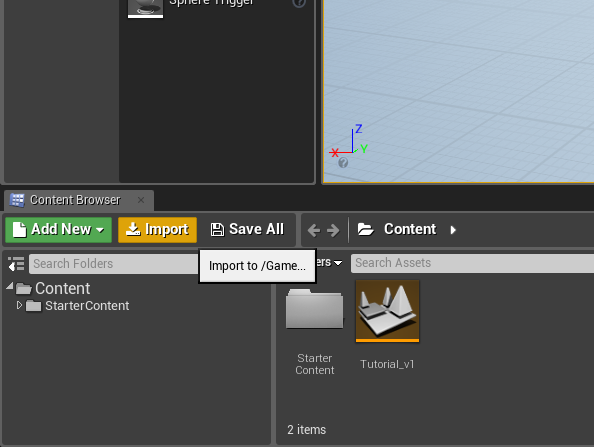
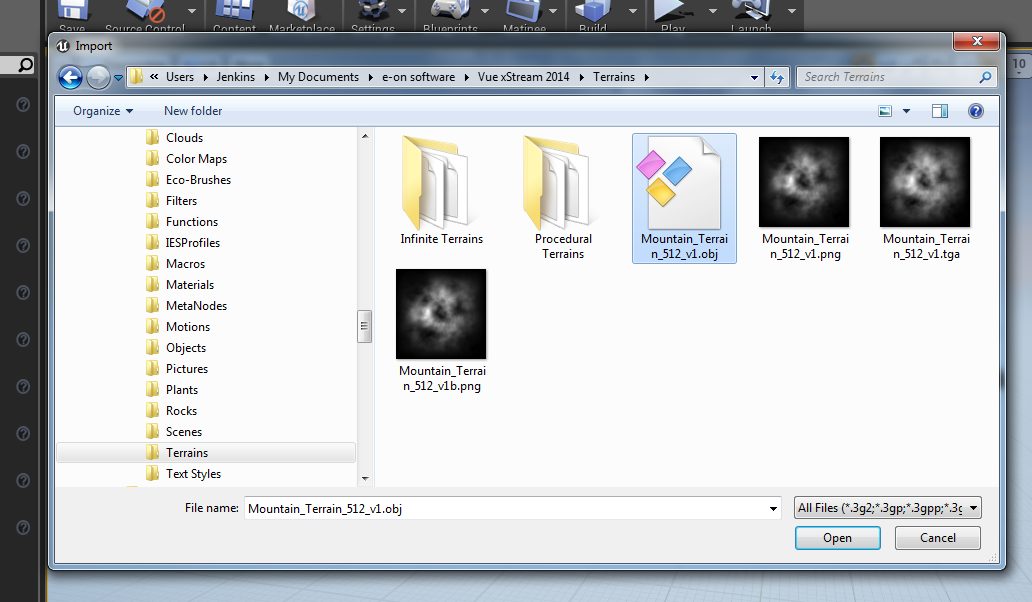
In your content browser, or from the file menu, choose Import.
Step F3
Browse to the OBJ you exported from Step D5b.
Step F4
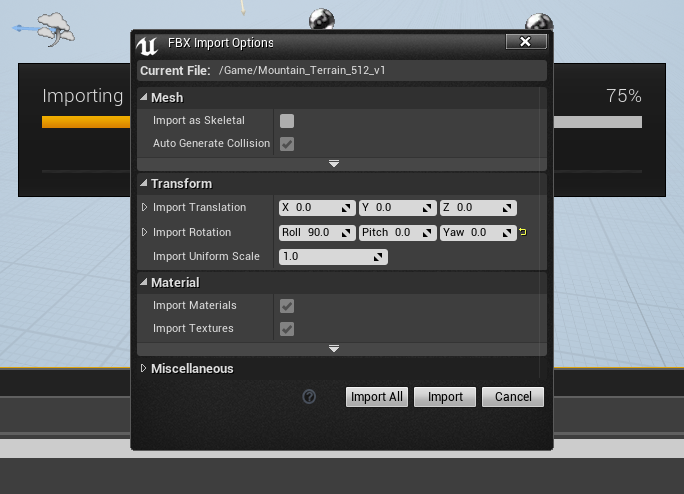
Upon import, you will be presented with "FBX Import Options" window.
You should change the "Roll" (X) to 90 to align the OBJ to it's correct upward facing orientation. This is caused by the way Vue exports objects, and what Vue see "XYZ" as.
Step F5
Press Import to start importing the terrain.
For high density/quality terrains, this may take a few seconds or more.
Your OBJ should then pop into the Content Browser.
You may get a warning such as;
No smoothing group information was found in this FBX scene. Please make sure to enable the "Export Smoothing Groups" option in the FBX Exporter plug-in before exporting the file.

Even for tools that do not support smoothing groups, the FBX Exporter will generate appropriate smoothing data at export-time so that correct vertex normals can be inferred while importing.
I have yet to find the correct way to retain smoothing groups from Vue within the exported OBJ.
Step F5
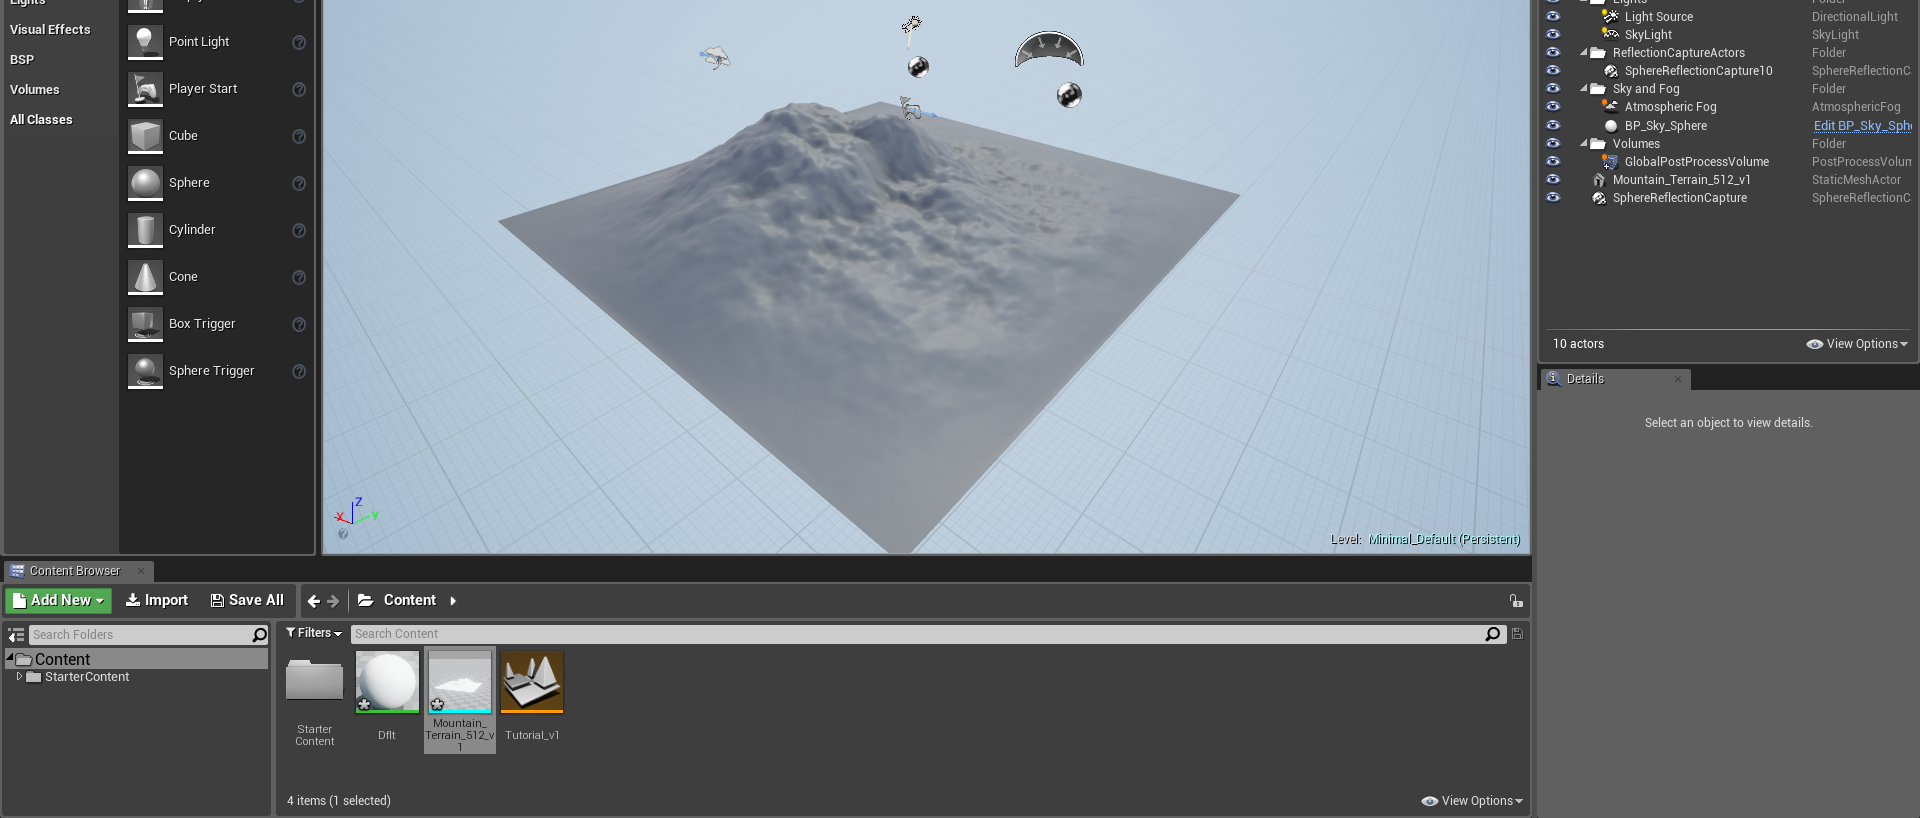
Now simply drag and drop your Terrain Mesh into the 3D world in the editor, and your terrain should appear like so;
As you may have already noticed, the physical size is much smaller than if you imported a Heightfield of the same terrain. This is due to scaling within the model itself.
Step F6
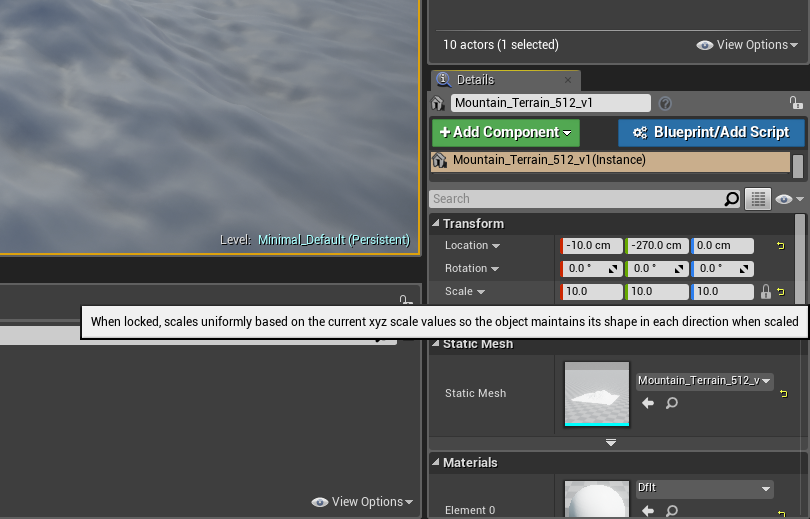
On the right hand Details panel, with your Terrain mesh selected, press the Padlock icon next to Scale.
This will make sure scaling our terrain is uniform. You can safely turn off the lock at any time to scale the terrain in any direction, but it's best to keep it uniform.
With the scale X:1 Y:1 and Z:1 the terrain is quite small and not playable, unless you're project is after a miniture terrain look of course!
Change the values to something like X:10 Y:10 and Z:10 to increase the mesh scale by 10x.
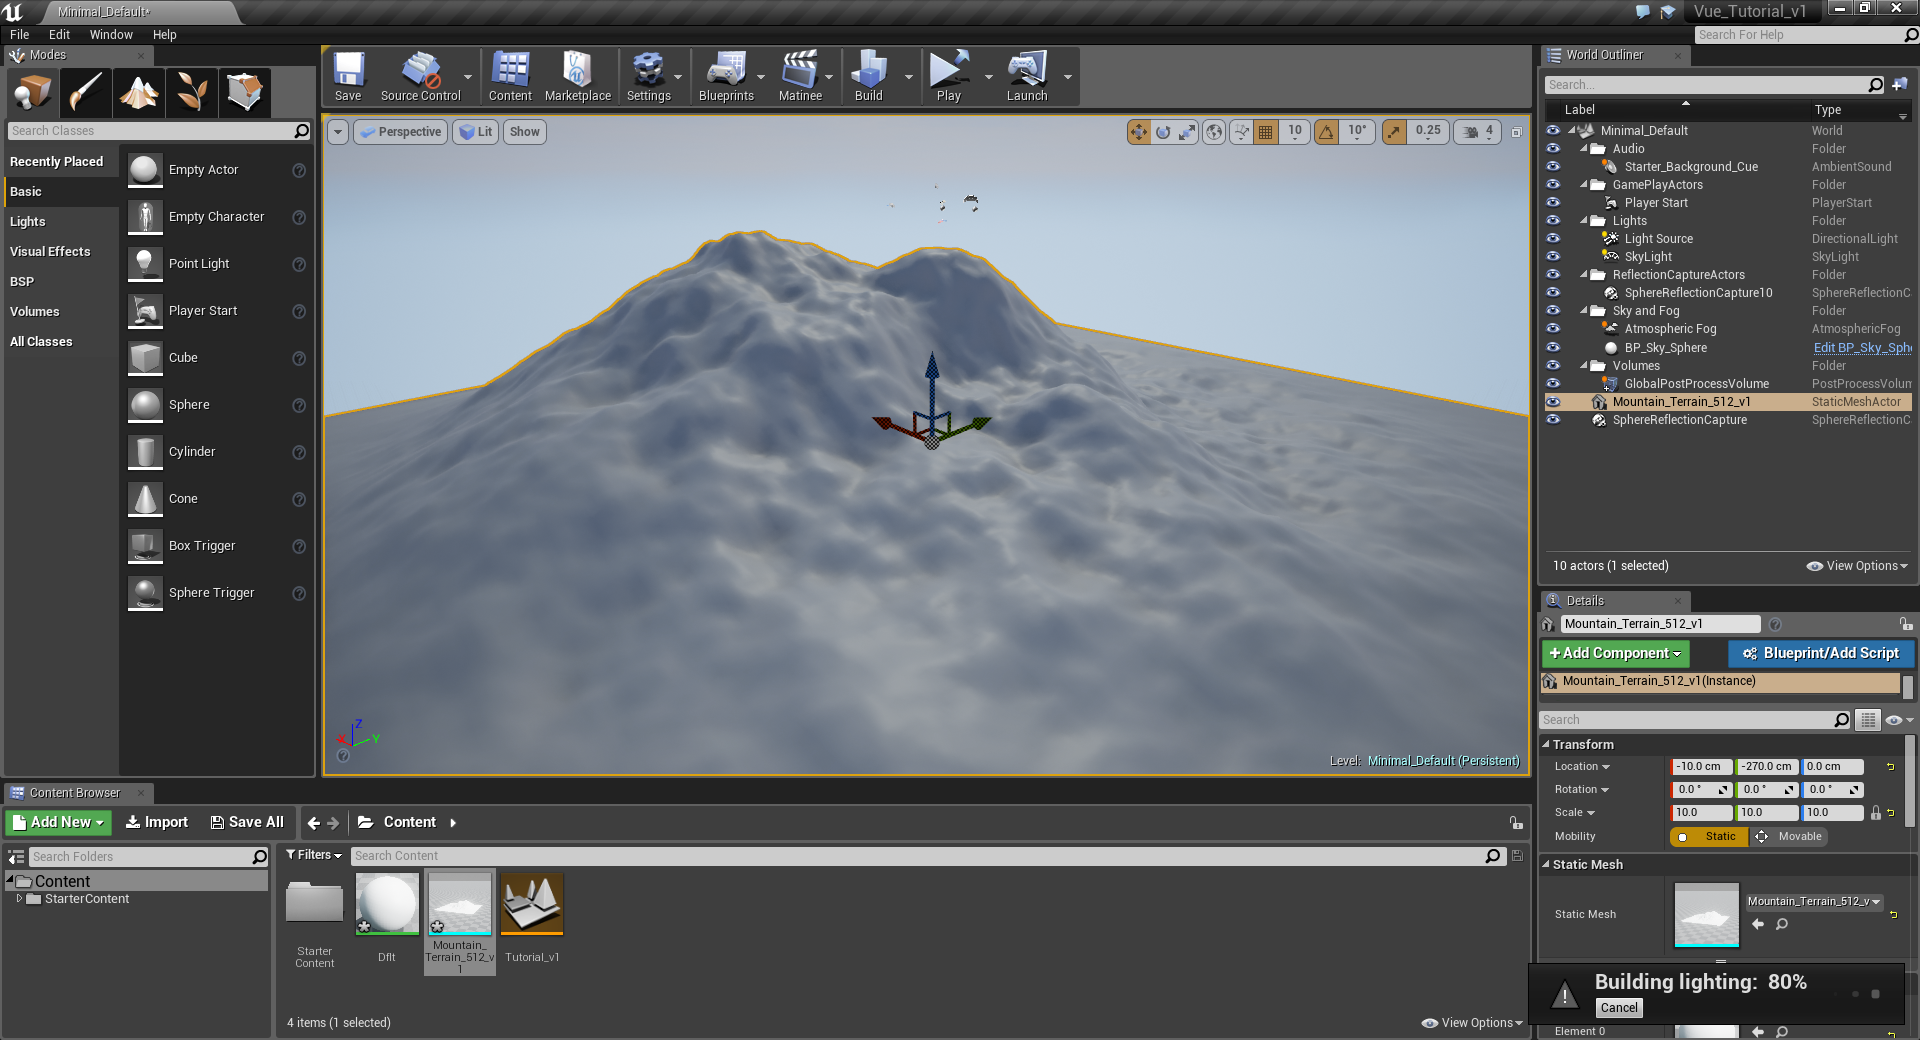
This should give you a much more believable terrain.
Done!
We've now got our high quality VUE terrain inside UE4, ready to use!
In our next tutorial, we'll cover working with weightmaps to texture the terrain based on it's features.
(Coming soon!)
Tutorial stats:
Written for UE4 Wiki by User:Jenkins.
Time to write:
~12 hours including testing, trial and error
Software used:
Vue xStream 2014 (of course!), Photoshop CS6, MS Paint (for quick desktop screenshot saving) and MediaMonkey (to give me inspirational tunes while composing this tutorial), and last but not least, Unreal Engine 4.9.2!
Time to cook heightfield based terrain (with no other meshes or LightMap Importance Volume):
Mere seconds at "Preview", 20ish secs at "Medium"
Time to cook OBJ based terrain (with no other meshes or LightMap Importance Volume):
60mins+ at "Medium" build quality. (Cancelled after 55mins sitting at 80%)
My specs:
i5 3570K @ 3.8GHz | ASUS GTX660OC | 8GB Corsair Dominator Platinum RAM | Samsung 1TB SSD (where all assets, engine & software is stored)
